Category Archives: Healthy Greens to Grow

How to process your Hydroponic Jalapeños Harvest (say that fast 7 times) & more importantly… How to Fix a Jalapeño Pepper Burn!

The jalapeños are coming on strong with the harvest right now on the hydroponic Tower Garden by JuicePlus+, so naturally I’m finding ways to take advantage of this bounty with three recipes in mind: jalapeño jelly, candied jalapeños, and good ol’ pickled jalapeños. (Spoiler alert: fav’ recipe links at the end of this post.)

You should be eating Jalapeño Peppers — home grown Jalapeños… 

Jalapeños are a good source of fiber, vitamin C, vitamin E, vitamin K, and vitamin B6 and common consumption of jalapeños may reduce cholesterol, triglycerides and platelet aggregation and partially improved liver damage due to the properties of capsaicin (the spicy part of the jalapeño). (You can read more about the study here.)

Be forewarned….

1AA04F66-6630-4C2F-94D0-999163D87288

As I went to slice and dice my jalapeños, the thought crossed my mind to put on some gloves, but since I didn’t feel anything as I was cutting the jalapeños, I ignored the thought and kept right on processing my crop — processing it without gloves on. I rinsed the cuttings in a sieve and proceeded to wash my hands and that’s when I began to feel the heat on my finger tips. Within 15 minutes my fingers felt like little flames had been lit. You guessed it — I had a jalapeño pepper burn on my left hand. Over the course of the evening I tried seemingly everything… scrubbing with soap and hot water, soaking in cold greek yogurt (which did feel soothing at first believe it or not), Biofreeze, pain meds, lavender essential oil, coconut oil, more scrubbing with hot water and soap followed by my black salve… no relief.

So at the stroke of midnight, as I’m laying in bed with my hand in the air hoping to catch a bit of breeze from the ceiling fan and contemplating my options in how to endure pain, my husband and I decide to do one more internet search for ideas to remove the oil from the recesses of my skin cells. I clumsily type one-handed into my phone’s internet search, “How long will jalapeño burns last?” Answer seemingly comes back in article after article that I could be suffering for several weeks if not a month! Aaaccckkk! And then I found Kendra’s post from newlifeonahomestead.com and sharing how she treated her jalapeño pepper burn. Her story seemed to match mine in trying everything the internet threw her way, but she found a solution that worked. And I shrugged my shoulders, looked at my husband and said, “Why not? Let’s try it.” So he went to the fridge and brought me… yellow mustard.

What I found to end all Jalapeño Pepper burn misery...

That’s right. Yellow mustard. We lathered it on like my fingers were hot dogs celebrating the Fourth of July. And the cold condiment felt amazing! Immediate relief! Like ice water hitting hot burning coals. I left the lather of yellow goodness on there (with a few more squirts of reapplication) for a good 35 minutes and then rinsed off with cold water. Were my fingers a little yellow? Yes. Was I in excruciating pain? Praise God, no. So I trotted off to bed.

How to treat jalapeño pepper burn on hand

Lesson #1: Never ever ever ever ever ever ever ever cut jalapeños without wearing protective food grade gloves. Gloves should be worn while handling hot peppers and make sure you definitely don’t touch your eyes, nose, and mouth areas with your hands if they’ve come into contact with the Capsicum oil from Jalapeño Peppers.

Lesson #2: If by chance you do encounter jalapeño’s Capsicum oil — reach for your handy-dandy yellow mustard.

01925BF2-B2AD-4D50-B324-BE12EBCC0EAB

And my jalapeños that I grew on my Tower Garden? They taste AMAZING! A million times better than anything I’ve found in the grocery store.

Remember, if you eat a pepper that is too hot, don’t drink water or milk to try to extinguish the spicy flames. Liquid only spreads the heat around. Instead, it is recommended to eat some sugar or honey and/or something starchy, such as bread, crackers or potatoes.

C24EFCDA-6B04-4E04-B122-7AED93A1272A.jpeg

How to grow Jalapeño Peppers hydroponically…

Here’s what jalapeño peppers need to succeed in the Tower Garden or similar hydroponic system (like a bato bucket).

EC/PPM: 3.0-3.5 EC / 2100-2450 PPM

pH: 6.0 – 6.5

Temperature: Hot peppers grow best in daytime air temperatures 65° to 80°F (18-26°C) and night temperatures above 55°F /13°C (nighttime temperatures between 60° and 70° are best). In addition, daytime temperatures above 90º F inhibits fruit formation, but fruiting will happen once temperatures drop back below 90º. If growing into the Fall, be sure to have a weather protection blanket on hand for evenings that have freeze warnings.

Light: 10 – 12 hours daily (outdoors). If growing indoors, the grow lights should be for flowering plants and placed 6 to 8 inches over the pepper plants. Any closer could cause scorching, any further away and the plants will not get the full benefit of the light. As the plants mature, adjust the height of the lights to maintain the 6-8 inch distance. (It is important to note that the Tower Garden lights are not rated for growing flowering plants according to the Tower Garden Juice Plus+ website, so if growing Jalapeño Peppers on the Tower Garden, grow them outside in full sun.)

Days to Harvest: Transplants will begin to bear ripe fruit in 70 to 85 days, depending on cultivar. 70 days Green; 93 days Red Ripe.

Other helpful tips to note:

  • Jalapeño Pepper plants will need support. The Tower Garden‘s support cage will work perfectly for holding up these plants. Plant them on the lower three tiers of your hydroponic vertical Tower Garden as they will grow to about 3′ in height (remember, things grow faster and typically bigger in a hydroponic system because you’re giving the plant everything it needs to thrive.)
  • Peppers don’t continue to ripen well off the plant (like tomatoes), so harvest when they are ready and process immediately if possible.
  • Peppers can be kept in the refrigerator, but avoid moisture. Avoid washing the peppers before refrigerating them, and dry them if they have dew or water from the irrigation system. Store them in a paper towel towards the top of the refrigerator.
  • Bacterial Spot: Bacterial spot can be seed borne. Purchase seed from a reputable source like Johnny’s Seeds or Seeds Now (100% Heirloom/Non-Hybrid/Non-GMO). Johnny’s pepper seed lots are tested for bacterial spot.
  • If planting for a fall crop in the Atlanta, Georgia (zone 7) region, the following are average freeze dates:
    Earliest Occurrence Latest Occurrence Average
    October 11, 1906 December 18, 1998 November 13

    Plant between the dates of August 1 and August 15 to ensure a fall harvest. Cover your Tower Garden with a weather protection blanket should there be a freeze warning.

  • Growing in soil? Here are some additional tips.

85993BB8-9E18-4C43-AA78-1537FACCA4DA.jpeg

Even with a thick stalk like this, they still need support.

5D801D53-B296-4B11-A419-4BFF18868BF5.jpeg

FCDE30FE-848D-4013-9BDC-01B468CF8690

In summary…

Grow jalapeños for their health benefits, but be prepared when it comes to processing these little gems of nutrition as they can cause serious jalapeño pepper burns on your hands if you don’t wear gloves.

Here are a few recipes I’ve personally tried. Maybe you and your family will enjoy them as well:

Enjoy!

— Erin


Growing your own baby spinach in a hydroponic or aeroponic system

Why you should be growing your own spinach instead of buying from the grocery store or big-box retailer:

If you follow EWG’s 2019 Shopper’s Guide to Pesticides in Produce™ report that comes out around March every year, you’ve probably heard that conventionally grown spinach has more pesticide residues by weight than all other produce tested, with three-fourths of samples tested contaminated with a neurotoxic bug killer banned from use on food crops in Europe. It has moved from being ranked 8th on EWG’s “Dirty Dozen” list to number two in containing the most pesticides in fruits and vegetables presently being sold in supermarkets and grocery stores around the United States.  The USDA has also detected pesticides on frozen and canned spinach, which suggests that washing and cooking reduces, but does not eliminate pesticide levels. (You can read the full findings on spinach in a press release here.)

As you may already be aware, Spinach is a great source of vitamin A, folate and vitamin C and a good source of vitamin E and potassium. But for your body to receive all these nutritional benefits, it is essential to consume the spinach as quickly as possible following harvest. Baby spinach leaves have a very high respiration rate and studies have shown that the temp these leaves are stored at plays a key role. For example, one Hort Technology study found that Baby spinach leaves (harvested 36 days after planting) experienced significant losses in nutritional benefit. Both total antioxidant activities and Vitamin C content showed a decrease after 6 days when stored at 39.2°F, whereas the total antioxidant activities and vitamin C for leaves stored at 71.6ºF decreased immediately after 2 days.  The concentration of magnesium (Mg), zinc (Zn), and iron (Fe) for example, declined after 8 days of storage at 39.2ºF, while at 71.6ºF they declined after 2 days of storage. Total phenolic compounds gradually decreased in samples stored at 39.2ºF whereas, samples stored at 71.6ºF showed a rapid decrease after 4 days. Results demonstrated that quality of baby spinach deteriorates as storage time and temperature increase. (You can read more about the study here.)

Research shows that nutritional benefits degrade with every hour following harvest, so the sooner you can consume your food after it’s been harvested, the more nutrients your body will receive from the spinach.

Degradation happens not only with temperatures, but you also need to factor how long it takes to move the spinach from harvest, transportation, to the product sitting on the shelf to be purchased at the store. It is estimated that it takes about 10-days for produce to be shipped from where it is grown to get to the consumer’s plate. Ten days!!! And you, the consumer are relying heavily on whether or not that spinach was kept at a constant 39.2ºF or lower in the post-harvest transportation and storage process. Could the reason be it is cheap at the store is it is an inferior product compared to what can be grown in your own home?

With a little know-how, you don’t have to settle for sub-par spinach and greens. You can grow in your own home and harvest when you’re ready to consume your spinach and greens for optimal nutritional benefit.

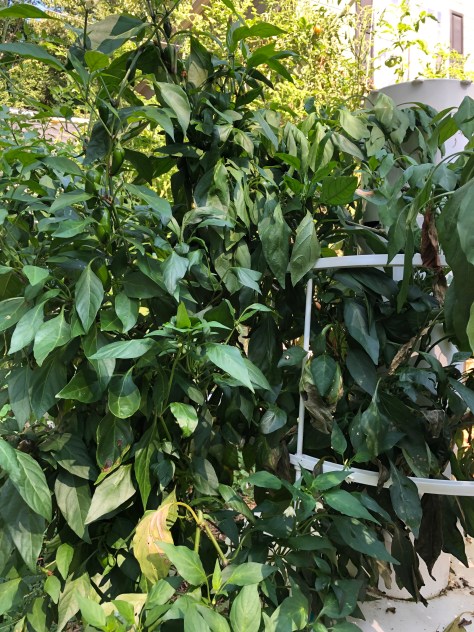
For the purposes of this article, we are writing it with aeroponic / hydroponic Tower Garden by JuicePlus+™ growers in mind for either indoors or outdoors growing spinach in their own home of on a backyard deck, but the info will also work in related hydroponic systems so long as the environment fits the plant’s needs.

Growing your own baby spinach will offer you the peace of mind and gain self-assurance knowing that your home-grown baby spinach is clean. You will also be able to harvest for maximum nutritional benefit when the plant is at it’s peak nutritionally going directly from your Tower Garden to your dinner table in a matter of minutes!


Growing your own spinach:

To grow your spinach, here are some things to keep in mind with what spinach needs to grow successfully. Depending on the time of year and whether you are growing inside or outside are key factors to consider. Spinach is a COOL SEASON crop, so you’ll want to avoid extreme heat which can cause it to bolt (go to seed and become bitter).
Monnopa Spinach Seed

Choosing your spinach variety:

Plant from seed making sure that you have new seed as older seed has a greater difficulty in germinating. Those varieties that are most suitable for the Tower Garden are recommended as follows:

Spinach: Monnopa Heirloom Low-Acid Spinach (Very Rare)
(100% Heirloom/Non-Hybrid/Non-GMO buy seed )Spinach_-_America_seeds_1024x1024

  • Monnopa Spinach is a perfect choice for those who need low-acid foods in their diet.
    – Extremely delicious and one of the most sweetest spinach varieties you can grow in your Tower Garden or hydroponic system
    – Very easy to grow.
  • Days to Maturity | 45-60 days

Spinach: Noble Giant
(100% Heirloom/Non-Hybrid/Non-GMO buy seed )Spinach variety Noble Giant for Tower Garden

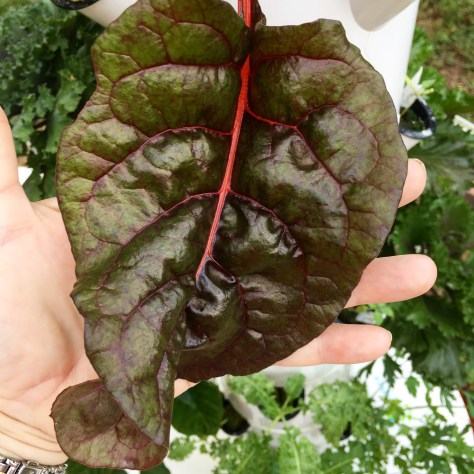
  • Noble Giant Spinach is heavy, glossy, dark green plant with leaves that are heavily savoyed and crumpled.
    – Extremely delicious and one of the most popular spinach varieties you can grow in your Tower Garden or hydroponic system
    – Very easy to grow.
  • Days to Maturity | 45 days

Spinach: New Zealand
(100% Heirloom/Non-Hybrid/Non-GMO buy seed )Spinach_-_New_Zealand_seeds_main_1024x1024

  • New Zealand Spinach seeds will produce very flavorful medium triangular-shaped green spinach leaves. New Zealand Spinach is a large growing plant.
  • This is one of the few spinach varieties that produces continuously all year, from spring to fall. The more you cut and use the more it will continue to grow.
  • And … Unlike the other spinach varieties, the New Zealand is one that can survive through the hot summers.
  • Days to Maturity | 75 days

Spinach: Bloomsdale
(100% Heirloom/Non-Hybrid/Non-GMO buy seed )

Spinach_-_Bloomsdale_seeds_1024x1024

  • Bloomsdale Spinach will produce heavy, glossy, dark green leaves.
    – Excellent flavor
    – Extremely easy to grow
    – Large, curly dark green leaves
    – Nice sweet taste
  • Days to Maturity | 45 days

Spinach: America
(100% Heirloom/Non-Hybrid/Non-GMO buy seed )

Spinach_-_America_seeds_1024x1024

  • America Spinach will produce a beautiful dark green plant in only 40 days. Smaller plant stature.
    – Excellent flavor.
    – Extremely easy to grow.
    – Grows best during the cooler months.
  • Days to Maturity | 40 days

Spinach: Matador Viking
(100% Heirloom/Non-Hybrid/Non-GMO buy seed )

Spinach_-_Matador_Viking_seeds_main_1024x1024

  • Matador Viking Spinach will produce beautiful large and smooth dark green spinach leaves in only 45 days.
    – Excellent flavor.
    – Full of nutrients.
    – Extremely easy to grow.
    – Grows best during the cooler months.
    – Grows really well in containers and other small spaces.
  • Days to Maturity | 45 days

Spinach: Winter Giant
(100% Heirloom/Non-Hybrid/Non-GMO buy seed )

Spinach_-_Winter_Giant_seeds_1024x1024

  • Winter Giant Spinach seeds will produce very flavorful large green spinach leaves.
  • Winter Giant is a variety of Spinach which is a member of the Spinacia family. It is a Vegetable and is treated mainly as a Annual, this means that it grows best over the course of a single year. source: myfolia
  • Known for growing to a height of appx. 2 feet. 
  • Days to Maturity | 55 days

Choose slow-bolting varieties for later spring plantings. Disease resistance is more important for fall crops. Savoyed (curly) leaves are handsome and keep better. New Zealand spinach and Malabar spinach are warm-season greens similar to spinach, but different species.

Common spinach cannot grow in midsummer. (For a summer harvest, try New Zealand Spinach or Malabar Spinach, two similar leafy greens that are more heat tolerant.) — Old Farmer’s Almanac

If you’re later in the season and have missed your seed start date, you can always purchase spinach starts from an area hydroponic grower. We recommend driving to a local grower to pick-up any seedlings vs. shipping (remember shipping containers can be extremely warm or extremely cold which can damage tender young plants.)

How many plants should you plant:

It is estimated that you will want ideally 15 plants per person. For a family of four, you will want to plant an entire Tower Garden with one extension for 28 plants and keep two spinach plants per rock wool making for 56 plants total.

Starting your spinach from seed:

Cold stratification: One to three-weeks prior to planting some growers will store seeds in the refrigerator. It has the effect of hardening them and may lead to a healthier plant.

If you’re planting outdoors, you’ll want to pay attention to your frost and freeze dates in your area. You can find these dates doing a google search or here. (If planting indoors, you can ignore the next paragraph and skip down to the next paragraph as you can plant spinach any time of the year using the Tower Garden LED Indoor Lights with the assumption that you will keep your home in the temperature range spinach requires.)

Having trouble getting your spinach seed to germinate? Try this pro tip: place seed in a plastic container in between two wetted paper towels and seal by placing lid on top of container. Check your seeds in 7-10 days and if the seed is viable, you will see some seeds with a root breaking out of the seed casing. You’ll want to move this germinated seed into a wet cube of rock wool and place a few bits of vermiculite around the germinated seed to retain moisture. DO NOT place on a heat mat. Place under bright artificial grow lights while keeping rock wool and vermiculite moist, but not drenched/soaked. Make sure to have a fan in the room for air movement as well as this will help to control humidity levels and stave off any fungal disease from setting into you seedlings.

Outdoor planting in a hydroponics system: If planting in the spring, you will want to start your seeds indoors or in a greenhouse so that your seedling start will be about four to six weeks old by the time your spring frost date rolls around. If planting in the fall, you’ll want to factor in your harvest date range and count backwards from your frost date. Note: in the fall, you will want to expose your seedlings to UV rays without excessive heat. Spinach likes to live around 45º-75º and may fail to germinate if too warm. For example, in the southeast, you will want to select a variety that has a short maturation date for a fall planting and use a UV light system of some sort to grow your seedlings indoors keeping the light source 8″-12″ if LEDs and 5″-6″ away from seedlings if fluorescent lighting.

LED-vs-Fluorescent1-bigger-1080x410

How many seeds to plant per rock wool: We recommend planting about 5 seeds per rock wool cube. Spinach typically germinates within 1–2 weeks. Be sure to use seed that is packaged for the current growing season as it will aide your ability to germinate the seeds. You can always remove any excess seedlings as the plants mature if you are concerned about crowding. Our philosophy is start out with more and thin down as needed (plus the seedlings will be healthy for you to eat as micro-greens).

How much nutrients you should give your seedlings:  Water daily with 1/4 strength nutrient solution until the seeds germinate and sprout. After sprouting use 1/2 strength solution.

Thinning out your seedling starts: As the seeds germinate and grow, you will want to pull (or also called “thin out”) the weaker seedlings from the rock wool. (Remember, this is not a wasted plant — you can try to replant in soil or simply enjoy eating it as a microgreen.)  You will want to leave leave 1-2 plants per rock wool to mature.

Transplanting your seedlings into your hydroponic system:  Seedlings should be ready to transplant to your Tower Garden or hydroponic system about 2–3 weeks after sprouting. Seedlings plants should be about 2-3 inches tall, with 3-4 true leaves, before they are ready to leave the nest and enter into the hydroponic / aeroponic Tower Garden or other related system.

Finally, remember that spinach plantings should be staggered in roughly 2-3 week intervals in order to ensure a continuous harvest. If doing a spring planting, your growing season will be longer than a fall planting. You can extend your fall outdoor planting season by adding a professional grade heater to your Tower Garden reservoir keeping water temps in the 70º F range for the root zone to continue to uptake nutrients — just be sure to cover your Tower Garden outside with a weather protection blanket like this when freeze warnings appear.


Nutrient levels for optimal growth throughout the growing season for spinach:

Nutrients:
EC:
1.5 mS cm-1  (1.2 for warmer temps)
(We recommend Tower Tonic Mineral Blend™ for a well-balanced nutrient solution to feed your plants the proper N-K-P and micro-nutrients. You can purchase a 1 gallon set of Part A and Part B here.)

PPM: 1260-1610
(We recommend Tower Tonic Mineral Blend™ for a well-balanced nutrient solution to feed your plants the proper N-K-P and micro-nutrients. You can purchase a 1 gallon set of Part A and Part B here.)

pH:  5.8-6.2
(pH is essential to help the plant uptake nutrients.)

Light: (Amount of sun or light exposure throughout the day)
Hydroponic spinach should get between 10 and 14 hours of light per day.

Spinach Temp Tips:
(Root zone temp is essential to help the plant uptake nutrients)

Maximum Temp 75º Degrees Fahrenheit

Optimal Day Cycle Temp  65º – 70º Fahrenheit

Optimal Night Cycle Temp  60º – 65º Fahrenheit

Seed Storage  40º to 70º degrees Fahrenheit

Germination  60º to 75º degrees Fahrenheit


Harvesting your spinach:

Make a note of how many days to maturation on the variety of spinach you are planting (found on your seed packet) and mark your calendar. When your plants have reached maturation, take a sanitized clean pair of hand trimmers or scissors and cut the outer older leaves of your spinach plant, leaving three center leaves to continue to grow. The plant will continue to produce leaves for you throughout the growing season. Simply return and harvest the outer leaves leaving 3-4 center leaves each time for multiple harvests. Ideally, your spinach should be eaten within a few hours of harvest; however, if storage is necessary, the correct conditions to prolong shelf life are rapid cooling down to 34°F and 95-98 per cent humidity (i.e inside a plastic bag).
Monnopa Spinach Seed

How to store spinach that is not consumed right away:

If you have more spinach producing faster than you can eat, there are a couple of options: dehydrating or freezing.  To dehydrate your spinach leaves, place on a dehydrator rack at 110º F for 12-24 hours. When the leaves are crunchy (you can break them in half), remove from the dehydrator and place in a tightly sealed pouch or Mason jar with an oxygen absorber. Dehydrated spinach can be used in soups and ground into a powder to add to pestos for additional nutrients. You can also freeze your crop in an air-tight bag or container and use in smoothies or defrost and use in recipes that may call for spinach. The benefit here is that a) you know what is on your spinach (no pesticides!) and b) your ability to harvest and process immediately vastly improves nutritional value of the spinach you’re consuming.

Let us know if you have any questions in the comments below. And happy growing!

Rainbow Swiss Chard: Better Indoors or Outdoors?

My Rainbow Swiss Chard in my outdoor Towers is happy happy happy!

9703042C-3278-4791-A7D7-54400A7A9189

Indoor Swiss Chard is going great as well, but definitely not as big as what’s growing outside and they were both transplanted on the same date.

34691259-32E3-4C7F-B12B-FAD7766BA51A


Health benefits of Swiss Chard:
Swiss Chard is a nutritional powerhouse — an excellent source of vitamins K, A, and C, as well as a good source of magnesium, potassium, iron, and dietary fiber.

How to cook with it:

Chickpeas and Chard with Poached Eggs

Swiss Chard Salsa Verde

Pickled Swiss Chard Stems

Swiss Chard and Mushroom Stuffed Breast of Veal

Autumn Greens with Sunflower Seeds

Chard Tzatsiki (I’d leave cucumber in the traditional tzatsiki and just finely dice in the Swiss Chard)

Swiss Chard with Currants and Pine Nuts

Swiss Chard Chips

#towergardenofficial #towergarden #gyhg #growyourhealthgardening #hydropinic #yearroundgardening 

Why you should eat Bok Choy and How to Grow it Tower-to-Table

Nutritional Benefits of Bok Choy and Why You Should Grow it + Eat It

Bok Choy (Brassica chinensis L.) belongs to a genus in the mustard family called the brassicas. Members of brassica include kale, cabbage, broccoli, cauliflower, and many other similar important food crops.

Bok choy also contains vitamin C, vitamin E, and beta-carotene. These nutrientshave powerful antioxidant properties that help protect cells against damage by free radicals. Nutritionally, bok choy is loaded with cancer-fighting properties as well as a multitude of other health benefits, some of which are still being discovered.  Bok choy contains folate. Folate plays a role in the production and repair of DNA, so it may prevent cancer cells from forming due to mutations in the DNA.

Bok-Choy-Nutrition-Facts-Why-You-Should-Eat

Bok Choy Fun Facts

The name “bok choy” originated from the Chinese word for “soup spoon” because of the shape of its leaves.

Bok choy ranks sixth on the Aggregate Nutrient Density Index (ANDI) for fruits and vegetables.

Dr. Fuhrman's Aggregate Nutrient Density Index (ANDI)

What Vitamin A does for your body…
Vitamin A is important for normal vision, the immune system, and reproduction. Vitamin A also helps the heart, lungs, kidneys, and other organs work properly. In fact, a single cup of bok choy contains the entire RDA of beta carotene, which has been shownto prevent night blindness and possibly reduce the risk of cataract and macular degeneration (source). It is always best to get your vitamin and minerals from a natural food source primarily and important to understand proper levels of Vitamin A intake — please refer to the source listed in the following link to learn more: Department of Health and Human Services.

What Vitamin C does for your body… Vitamin C is required for the biosynthesis of collagen, L-carnitine, and certain neurotransmitters; vitamin C is also involved in protein metabolism [1,2]. Collagen is an essential component of connective tissue, which plays a vital role in wound healing. Vitamin C is also an important physiological antioxidant [3] and has been shown to regenerate other antioxidants within the body, including alpha-tocopherol (vitamin E). It is always best to get your vitamin and minerals from a natural source primarily and important to understand proper levels of Vitamin A intake — please refer to the source listed in the following link to learn more: Department of Health and Human Services.

What Calcium does for your body… Calcium is required for vascular contraction and vasodilation, muscle function, nerve transmission, intracellular signaling and hormonal secretion, though less than 1% of total body calcium is needed to support these critical metabolic functions — the body uses bone tissue as a reservoir for, and source of calcium, to maintain constant concentrations of calcium in blood, muscle, and intercellular fluids. It is always best to get your vitamin and minerals from a natural food source primarily and important to understand proper levels of Vitamin A intake — please refer to the source listed in the following link to learn more: Department of Health and Human Services.

What Iron does for your body… Iron is an essential component of hemoglobin, an erythrocyte protein that transfers oxygen from the lungs to the tissues [1]. As a component of myoglobin, a protein that provides oxygen to muscles, iron supports metabolism [2]. Iron is also necessary for growth, development, normal cellular functioning, and synthesis of some hormones and connective tissue [2,3]. It is always best to get your vitamin and minerals from a natural food source primarily and important to understand proper levels of Vitamin A intake — please refer to the source listed in the following link to learn more: Department of Health and Human Services.

While green vegetables such as bok choy provide your body with many essential vitamins and nutrients, even healthy foods should be eaten in moderation. Too much raw bok choy can have a serious and potentially life-threatening effect on your thyroid gland, and medical professionals advise against overindulging in the raw version of this tasty vegetable. (source)

13EF2778-3043-46D6-82C4-F1DE853C22DC

How to Grow Bok Choy in a Hydroponic System like a Tower Garden:

You can purchase Bok Choy seeds (50 pack) here.
Bok Choy Seeds Now Preview

For planting Bok Choy seeds, you’ll want to plant two seeds per 1.5″ rock wool cube, placing the seed about 1/4″ down into the hole of a rock wool cube. Cover with wetted micah. It will typically germinate in 4-7 days. Transplant into your Tower Garden when your starts are approximately 2″ high and as soon as there are true leaves on the plant; this will typically occur in about four weeks from your seed start date.

JuicePlus+ Tower Garden

Ideally, grow Bok Choy indoors with a light source. This will reduce any aphid pressure common from exterior elements. Bok Choy thrives in a temperature range of 55°-75° F with a pH of 6.0-7.5 range and a EC value of 1.5-2.5 (or PPM value of 1120 – 1750).

Be sure to write down your seed starting date as you’ll want to wait to harvest Bok Choy until 8-11 weeks.

Check out the difference between Tower-to-Table Bok Choy vs. Grocery Store Bok Choy Produce offerings.

Tower Garden vs. Store Bought Bok Choy

While checking out the produce section at our local grocery store, I peeked over at the Bok Choy and it was limp and lame — you could tell it had been sitting there for days.  One of the key benefits of Bok Choy is its dark green leaves chalk-full of vitamins and minerals. The store Bok Choy begins to lose it’s nutritional benefits the longer it sits on the shelf, that is one of the benefits of having a Tower Garden where you can simply walk over to your indoor garden / garden on your deck and snip off what you need. The Bok Choy on the Tower Garden is similar to Kale — it will continue to regrow if you only take the outer lower leaves so you can get multiple harvests off of the same plant!

When I looked at cost, the store wanted $2.49 per Bok Choy in our neck of the woods (at the time of publishing this article in October of 2018). I plant two Bok Choy plants per rock wool and have four on the same level in my Tower Garden growing — that’s approximately $20 worth of fresh Bok Choy at my finger tips!


Grow your own food on a hydroponic Tower Garden


When Should I Plant My Hydroponic Tower Garden Bok Choy to Enjoy Fresh For the Holidays?

The advantage of growing in the Tower Garden hydroponic / aeroponic growing system is you can grow all year round with indoor lights! The following are key planting dates if you want to use Bok Choy in holiday sides and dishes (if planting in indoor Tower Garden with lights):

  • Thanksgiving Planting-Prep:
    Plant your Bok Choy seeds September 30th – October 6th to have in time for Thanksgiving dinner sides/dishes.
    Google_CalendarAdd Planting Reminder to Google Calendar
  • Christmas Planting-Prep:
    Plant your Bok Choy seeds October 4th – October 10th to have in time for optimal Tower-to-Table freshness for Christmas sides/dishes.
    Google_CalendarAdd Planting Reminder to Google Calendar
  • New Years Planting Prep:
    Plant your Bok Choy seeds November 16th – November 23rd to have in time for optimal Tower-to-Table freshness for New Year sides/dishes.
    Google_CalendarAdd Planting Reminder to Google Calendar
  • Valentine’s Day Planting Prep:
    Plant your Bok Choy seeds December 6th – December 20th to have in time for optimal Tower-to-Table freshness for Valentine’s Day dinner sides/dishes.
  • Easter Dinner Planting Prep:
    Plant your Bok Choy seeds February 10th – February 24th to have in time for optimal Tower-to-Table freshness for 2019 Easter Day dinner sides/dishes.
    Google_Calendar Add Planting Reminder to Google Calendar

How to Use Bok Choy in the Kitchen to Cook and Eat What You Grow

The BEST part of the plant are the green leaves… you can eat the whole plant, but focus on eating whatever is green especially!

      • Try it in an immune-boosting soup like this one (recipe) or this soup recipe featured by “Plated” that incorporates mushrooms which also have health benefits (recipe). Remember, cooking vegetables reduces the number of nutrients they contain. Add your Bok Choy right at the end of the cooking process before you serve your soup. Tip: Try to find a protein-based gluten free noodle if possible.
      • Try it in as an element mixed in to stir-fried veggies with chicken like The Mind Full Mom’s idea here (recipe).
      • Enjoy it simply sauteed. This Baby Bok Choy recipe by Sam Sifton has a high rating online and worth the try or this recipe on Chow Hound — just a note to be careful with the soy sauce and vegetable broth as these can be high in sodium. The American Heart Association recommends not exceed 1,500 mg of sodium per day.