Use the following chart to help jog your memory on when it is best to prune either a fruit tree or a bush. We will come back to this list periodically to add to it as we have updates. And after you have pruned, be ready for when blooms emerge as spring is an ideal time to fertilize once you see new growth.
Fruit Trees:
Apple
Winter or early spring
Train tree for low head and prune moderately. Keep the center of the tree open with main branches well-spaced around the tree. Avoid sharp V-shaped crotches.
Cherry
Winter or early spring
Prune moderately, cut back slightly the most vigorous shoots.
Citrus
Spring after risk of freeze has passed,
Prune after risk of freeze has passed, but well in advance of summer heat. Water sprouts, a.k.a. “suckers”, emerge frequently, especially the first few years of the tree’s life. It’s best to remove suckers as they appear, otherwise, they take energy from the tree. The thorns also make harvest difficult. If the suckers do produce fruit, it is usually bitter and unpalatable.
Peach
Early spring before buds
Prune vigorously removing one-half of the previous year’s growth keeping the tree headed low and well thinned out.
Plum
Early spring
Remove dead and diseased branches, keep tree shaped up by cutting back rank growth. Prune moderately.
Quince
Early spring
Cut back young trees to form low, open head. Little pruning of older trees is required except to remove dead and weak growth and keep airflow.
Flowering Japanese Magnolia
Early spring
Before buds open, trim off side limbs that cross another limb. Keep center of tree open for airflow and birds will nest in it.
Fruit Bushes, Flowering Bushes, and Vining Plants
Blackberry
After bearing and summer
Remove at ground canes that bore last crop.In summer, but back new shoots 3.5′ high.
Boxwood
Early spring
Trim and shape before new growth occurs.
Blueberry
Winter while plants are dormant
Blueberries only grow on branches that are at least one year old, but the older the branch, the fewer the berries produced. You must prune the bushes so that they provide enough new growth for blueberry production the following year.
Raspberry
After bearing and summer
Remove at the ground in fall canes which bore last crop. In summer, head back new canes 20 ” to 22″ inches high.
Currant
Early spring
Remove old unfruitful growth and encourage new shoots.
Gardenia
Right after blooms have faded
Pruning your gardenia every other year typically keeps the size manageable. Gardenia blooms on new growth, so pruning after bloom cycle is ideal.
Gooseberry
Early spring
Same as currant—cut back shoots at 12″ inch and side shoots to two buds.
Grape
Late winter or early spring
Requires heavy pruning of old wood to encourage new bearing wood. Remove all old branches back to main vine. Cut back the previous year’s new growth to four buds.
Hydrangea
Early spring
Hills of Snow variety cut back to ground. Other varieties: remove dead and weak growth, cut old flowering stems back
Elderberry
After fruiting (Sept/Oct)
Prune severely. Remove one-half of season’s growth on established plants.
Roses, Tea, Hybrid, Perpetual
Early spring
Cut away all dead and weak growth and shorten all remaining branches or canes to four buds for weak growers and five buds for vigorous varieties.
Roses, Climbing
After flowering
Cut away all dead and weak growth and shorten all remaining branches or canes to four buds for weak growers and five buds for vigorous varieties.
We have a FANTASTIC resource you will want to bookmark. It tells you what conditions the particular variety needs to help it germinate. Some seeds need it dark. Some seeds need bright light to germinate. Some need to be soaked beforehand. No matter the situation, this is where you want to start.
And remember, when you start from seed, even though you are taking a bit of a gamble on some seeds, the thing that is so awesome is you can grow varieties not commonly found at big-box retail garden centers. A whole new world awaits you!
Oh — and if you’re new to seed starting, be sure to check the “Seed Starting” tab on our Web site for other helpful tips to help you in your quest to start seeds at home.
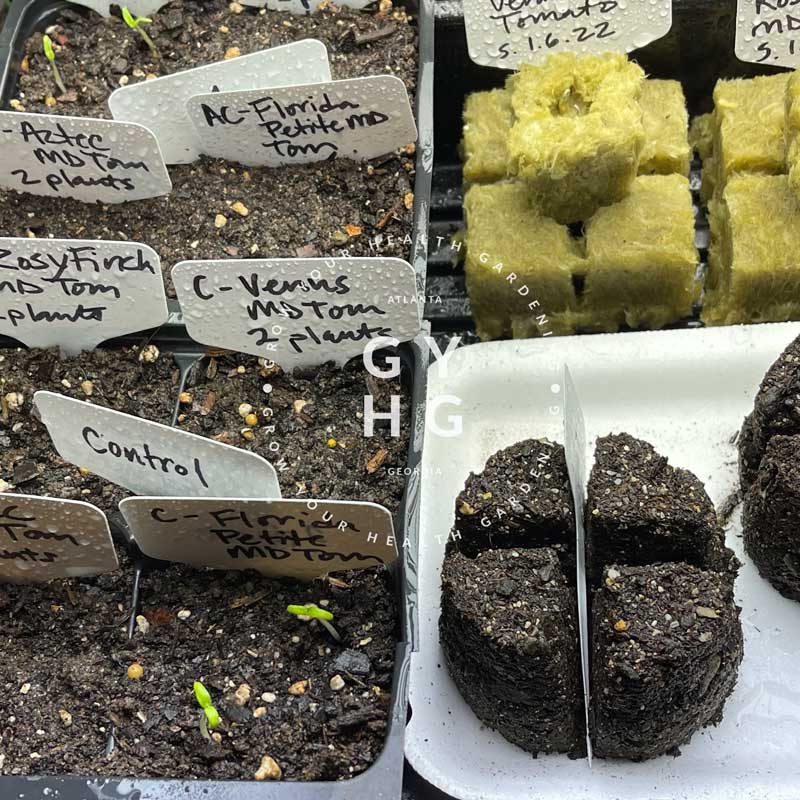
I’m scheduled to give a “Tomato Talk” to a local group of community members who are interested in growing their own tomatoes from seed in the next 10 days and in the process for preparing for this talk, I thought I’d do a little soil test for what makes for a strong seedling and share it with y’all as things grow so that you can grow your health through gardening and learn tips for what I learn along the way. 😉
I took four (4) 4-pack planting trays and used the same batch of sifted soil for all four packs. The control 4-pack is straight up soil only. The second 4-pack I amended the soil with worm castings only. The third 4-pack I amended the soil with activated charcoal from a company I heard about and am trialing their product before bringing it to sell in our store and online. The fourth 4-pack soil is amended with the same ratio of worm castings as the second 4-pack as well as the same ration of the third 4-pack of soil with activated charcoal (so this final 4-pack has both amendments in it.)
A glimpse of our current seedling test subjects.
I then repeated the same amendments in another batch of similar soil, but put it in a soil block and amended certain soil blocks with worm castings only and activated charcoal castings only and a mix of both worm castings and activated charcoal. I also included rock wool just to compare growth of seed in this substrate as well. The rock wool will need to have kelp diluted and added to it as the seedlings grow as the rock wool is pH neutral and is devoid of nutrients.
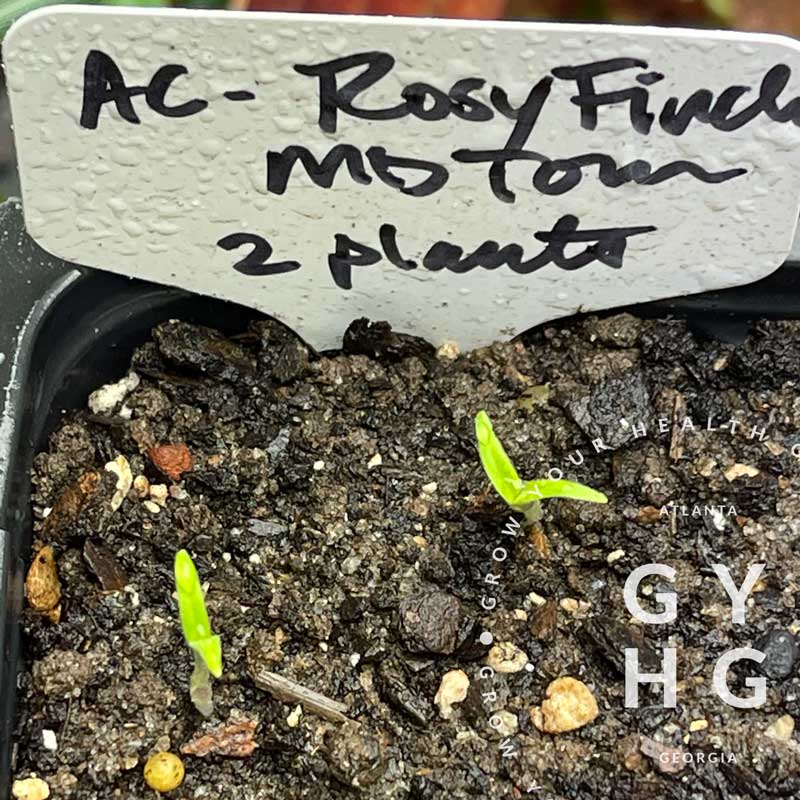
For plants, I chose seed that was from the same lot, same harvest, same parent plant. All seed is our homegrown line of seed that we’ve saved and developed season after season, so I am confident that we have good strong seed stock to run the test. I chose to plant microdwarf tomatoes, because we are in the middle of winter here in Atlanta, Georgia and I can grow micro-dwarf tomatoes indoors under lights and evaluate results before our busy season of the summer harvest begins. We selected different micro dwarf tomato cultivars including Florida Petite Microdwarf Cherry Tomato, Rosy Finch Microdwarf Cherry Tomato, Aztek Microdwarf Cherry Tomato and Venus Microdwarf Cherry Tomato.
Rosy Finch Micro Dwarf Tomato Seedlings pop out of the soil ready to reach for the light.This is a Fiskars Soil Block that is a plunger style and easy to use. You can make soil blocks of four or one larger soil block.Setting the first soil block with the other four 4-pack trays already finished and planted.Small bits of Activated Charcoal in equal parts and mixed thoroughly in each 4-pack of soil as well as equal parts of worm castings mixed well in 4-packs of soil keeping things as consistent as possible. We are testing to see if the activated charcoal makes any significant difference before carrying a product in our store. Stay tuned!
To gauge results, we will weigh all produced fruit and count the number of blossoms and the number of final fruit set by each tomato plant. I will do my absolute best to give equal amounts of water by first measuring what each plant is given and offering the same amount to each plant.
My hypothesis is that the air pruning action of the soil blocked starts will produce stronger seedlings for transplanting in the long run because when that root hits the air, it will signal to the plant to produce roots on the interior of the soil elsewhere. More roots will mean the plant has more opportunities to take up moisture and nutrients in the long run. I also think the soil block with BOTH worm castings and activated charcoal will perform the best because the worm castings will further any biological activity that may be happening within the soil and “cling” to the activated charcoal which the plant can tap as it needs.
That’s my best guess, but I could be wrong! We shall see what plays out in our little science experiment. What do you think will perform the best and why? Tell us in the comments below!
• The key to giving your body better nutrition is to grow your own food. — You will be able to eat what you grow shortly after harvest, thereby getting the highest level of nutrient that the plant can provide because the plant is allowed to grow to full maturity where nutrients will be at a peak AND you will be able to consume it shortly after harvest. — You have control over how your food is grown meaning soil health, hydroponics, and anything applied to the plant to control pest pressure or enhance nutrition profile in plant like beneficial biological foliar tea applications. — You will benefit not only physically, but mentally, emotionally and spiritually from being more connected to your food and outdoors.
• If you’ve never grown your own food, taking that first step can feel overwhelming. Begin by just choosing to focus on how to grow a food that you eat already and taking a moment to think about why you are motivated to make the effort.
• A simple and very doable approach to getting started growing your own food is to simply ask one question, “What one new thing can I learn to grow this year?”
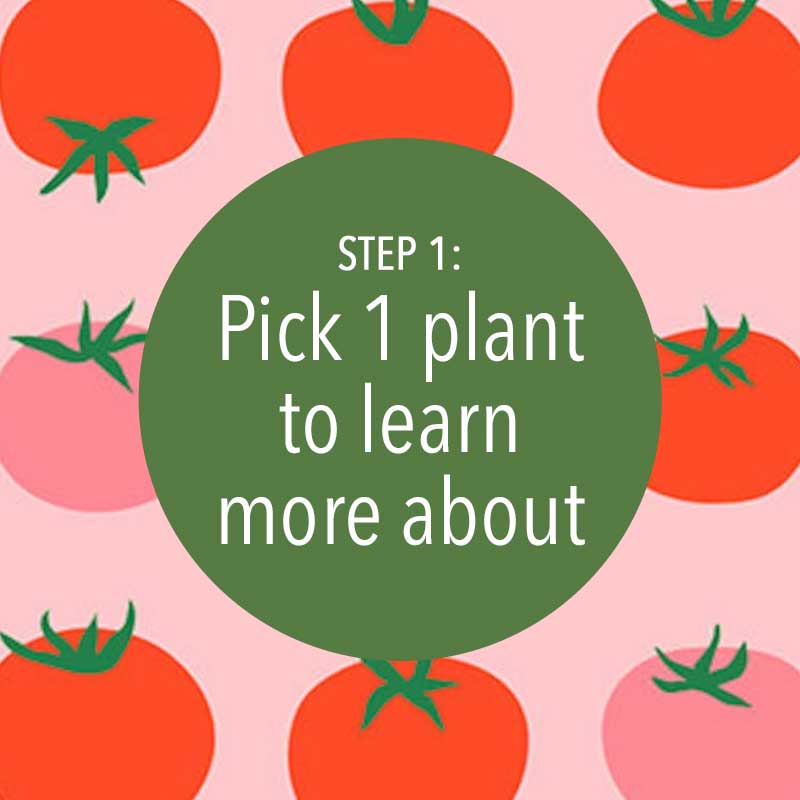
The key to moving to better nutrition for your body is to grow your own food. That’s how my journey began. What did I do? I simply became curious and had an attitude to learn — and I picked just one plant to learn about. I deep dove into learning everything I could about that one plant and what it needed to grow. Single focused. One simple step. A willingness to change and grow through gardening.
Background Image credit: Kim Kight Moda Fabric Nov 2021 Release
Here’s how you can make a BIG difference this year in your health by just learning to grow one new plant:
Step 1: Consider healthy grown food choices you are already enjoying.
You’re more likely to eat what you grow and if it’s already something you’re familiar. Research has even shown this to be true with children — children are more likely to eat what they have grown. Why would we be any different? 😉
For example, I like to eat Kale. I noticed that Kale was on EWG’s (Environmental Working Group’s) Dirty Dozen List. I didn’t want to give up eating kale simply because it was often sprayed by those growing it and wanted to reduce the amount of chemicals I was putting into my body. I also found that my kids like the cheesy kale chips at the store, but my pocket book felt the pain every time I had to purchase that in bulk. The best solution? Learn to grow it.
Tower Garden growing hyroponic lettuce, kale and bok choy. To learn more visit: erincastillo.towergarden.com
Tip: If you’re new to growing Spinach and gardening altogether, I recommend that you don’t pick spinach as your first plant to try growing from seed. Instead, purchase a start and grow it from that stage or read our article on how to start spinach from seed.
Background Image credit: Kim Kight Moda Fabric Nov 2021 Release
Step 2: Learn everything you can about what the plant needs to grow.
Single-tasking has been proven to be THE BEST way to get something done. Keep it simple. Don’t over-complicate things. Just choose one thing and learn it well. Focusing on learning one new plant will set you up for success and lead to better nutrition for your body!
We are so blessed to live in an age where we have so much information at our fingertips with a simple search. Take advantage of this and devote at least 15 focused non-distracted minutes a day to look-up details about the plant you’re wanting to learn how to grow. Record what you learn on a sheet a paper and put it in a 3-Ring Binder. This becomes a handy-reference in seasons to come as you add other plants to your ever growing notebook.
You’ll find that after a couple of growing seasons, you’re able to add more than one plant to your ever-growing “new plants I’m curious about” list. And you’ll be able tackle more because once you know a plant, you can grow a different similar variety with ease because you’ve already studied that plant group.
“Take advantage of this and devote at least 15 focused non-distracted minutes a day to look-up details about the plant you’re wanting to learn how to grow. Record what you learn on a sheet a paper and put it in a 3-Ring Binder” — Erin Castillo, Owner of Grow Your Health Gardening
Tomato Lover’s Heirloom Tomato Seed Collection by Grow Your Health Gardening Seed Co. is our top pics for anyone who wants to grow tomatoes not found in the big box chain or grocery store. A true culinary delight.
Let curiosity guide your research. Ask questions like:
What temperature does this plant like to grow in: Cool or Warm? Knowing the temperature preference of a specific plant cultivar will tell you what time of year to start growing that plant. For example, kale likes to grow when it is cooler. Okay. How cool? Is there a certain range of temperature it prefers? Okay. We find that it likes 70ºF-80ºF, but some varieties like Lucinato (Dinosaur Kale), Dwarf Siberian, Vates Blue Scotch, Premier, White Russian, and Red Russian can tolerate SOIL TEMPS as low as 20ºF. I can look up those temperature ranges for the area I live in and look to see about when those temperatures are occurring. Then, when I look at the days to maturity, I can use a calendar calculator and count backwards from that temperature range and I can get my seed start date. Not sure how to quickly find a date? Just do a keyword online search for “count days calculator” or pull out an actual monthly calendar and physically count the days backwards with your finger.
What sort of lighting requirements does the plant need? Most vegetables need 8-10 hours of full sun a day. Consider watching where you have a sunny patch for the longest hours in a day. This is going to be your growing area. Don’t have a sunny patch and just a lot of shade? No problem! Invest in an indoor growing system with grow lights where you can control the temperature and grow year round.
What is the ideal pH range your plant needs to take up nutrients? Your pH level plays a very important role in which nutrients a plant can access and use to fuel it. I’ve provided a chart (below) to illustrate which nutrients a plant can take up when it’s within the ideal pH range. Most plants need somewhere between 5.5 to 6.8. Leafy greens prefer the 6.0 pH to 6.5 pH range whereas tomatoes prefer between 6.0-6.8 pH. Notice how kale, which likes it between 6.0-7.0 pH, when soil or water in a hydroponic or aquaponic system is kept between this range will be able to access nutrients like Nitrogen, Phosphorus, Potassium, Sulfur, Calcium, Magnesium, Iron, Manganese, Boron, Copper and Zinc and Molybdenum. If you’re growing hydroponically, you can quickly and easily test pH levels with a pH meter like this. If you’re growing in soil, you can get a soil test from your local county extension office for around $10. You can also get a device like this that will get you fairly close. Remember, soil takes several months to adjust the pH level. Hydroponics and Aeroponics takes only a few hours with either pH up or pH down.
pH Absorption Chart shows which nutrients are available to a plant based on pH range.
Heirloom Beans are a fun way of exploring a healthy and high protein food group. There are so many different types of beans (bush beans, pole beans, runner beans, etc.) that the options are endless in enjoying new types of beans you can’t find in the grocery store. Check out our line of heirloom beans at https://store.growyourhealthgardening.com
What sort of nutrients does my plant require? If you’re working in soil, it will be helpful to understand your soil food web and how micro-organisms and beneficial bacteria within the soil work together to help replenish nutrients in the soil for the plant to access. If you’re working in hydroponics or aquaponics, you’ll want to purchase a TDS meter and a well-rounded nutrient like this Mineral Blend. When you go to add your nutrients, simply keep your PPM levels within the ideal range the plant prefers. You can find a fantastic hydroponic cheat sheethere that we’ve created for your convenience.
How long does it take for my plant to grow? Knowing this tidbit of information helps you figure out when to start growing your desired plant and calculating days to ensure you can get your plant to harvest stage. For example, I know that kale takes about two months to go from seed to ready for harvest. Again, you can reference most of this information in a simple chart here.
How many should I plant to produce enough food for myself and my family? How does that fit in with the growing space that has enough lighting that I have to work with at home? Learning how big a plant gets and if it continues to grow after a harvest can help you understand what sort of return you’ll get from starting one plant and growing it out.
Are there any diseases or pests that may target the plant I intend to grow? Can I take any preventative measures that don’t require chemical applications? For example, kale can get hit by the army worm. The eggs are laid by pretty white butterflies on the underside of the kale leaf where their young can have an instant food source. By simply covering your food crop with a net before these butterflies show up, you can dramatically increase your success rate and achieve your goals in growing healthy food. And know that it’s perfectly fine to learn as you go… don’t feel that you have to have a handle on all of this before you begin. When something shows up, you can look up what it is and how to deal with it. It’s part of the learning process.
What can I do with what I grow? How can it be preserved? For example, if I have a lot of kale, I can dehydrate it and make cheesy kale chips to store in my pantry (which my kids love). I can freeze it and use it in morning smoothies. I can dehydrate it and use in soups for added nutrition. Thinking how you already use this food will help you anticipate and plan ahead when the plant is ready to harvest.
How will growing this benefit me? We are such a consumer culture that wants things ready in an instant. We have to break this cycle. We forget that there is joy to be found in the rhythm of being more connected to our food and the process of seeing something from beginning to end — from seed to harvest to table. There are intangible benefits to note, like getting more exercise and being outside in the sunshine and fresh air which produces Vitamin D in your body and (sleep chemical). It relaxes your body which reduces stress and cortisone levels giving your thyroid a break. Then there’s the actual nutritional benefits. What vitamins does the plant you intend to grow give to your body? How will those nutrients help you be healthier and stronger? Sitting down and focusing on these things and having them written down will motivate you to keep going when you encounter any challenges to overcome along the way.
Background Image credit: Kim Kight Moda Fabric Nov 2021 Release
Step 3: Reap the rewards. Bask in the benefits of your time and effort.
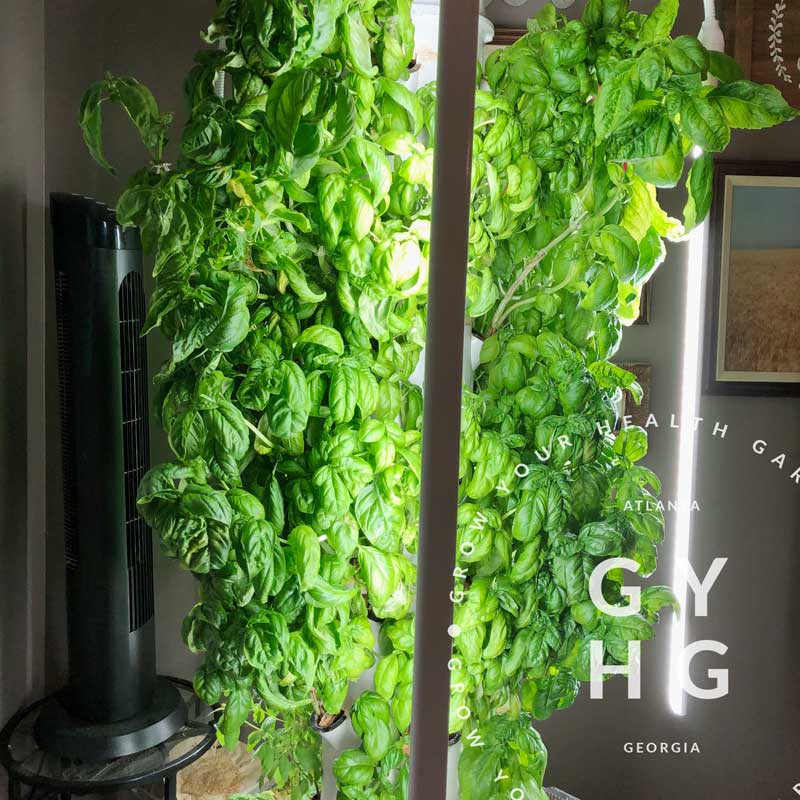
I just can’t describe how good it feels to have those you love, enjoy eating something that I grew. It feels good knowing I gave them the very best thing that they could eat and KNOW that it wasn’t sprayed or treated with any chemicals. One of the best feelings ever. I remember when I learned to grow basil and made pesto. My kids loved it! (And I did, too!) I loved that I could easily make it and put in the freezer for a quick week-night meal and that it was immune boosting. It’s the “new elderberry syrup” for improving our health. (Yes, basil is that healthy!)
Rosemary Lemon Chicken is a tasty dish and the flavors are more pronounced with freshly picked and harvested rosemary. Check your growing zone to see what rosemary varieties are frost-hardy in your area.
Rosemary harvested can be dehydrated and stored to add to any dish later on.
If your plant didn’t grow or produce like you thought it would, that’s okay, too! In our home, we know that not meeting our goal or objective doesn’t equate to failure. Failure is when you don’t even try. If you feel discouraged, pick up your bootstraps and realize you have already succeeded because you took that difficult first step when so many others wouldn’t even attempt it. You are further along than you were before you ever tried. We can learn from everything we do. And as you’ll see in growing plants, every plant has very specific needs that must be met in order for them to grow (which also may make you reconsider the whole antiquated evolution theory and how things just may have “coincidentally happened” … more on that another time… but I think you may discover that plants are more complex than just throwing a seed in the ground. They were designed with a purpose and need specific parameter to grow and thrive.)
Even the chickens can enjoy the fruits of our labor. Kale is a FANTASTIC healthy green (or purple in this case) to feed chickens in the winter. Here, we hang a wire basket and share some of the bounty with our girls knowing what they eat will benefit us as well when it comes time to enjoy the eggs they produce.
So remember, there are countless benefits to consider. Think about and write down how learning about that one plant has or will benefit you. When I consider my own journey, growing my own food has been more than just plants though…. I have gotten off the couch and out from behind my desk and computer (except for this moment of course as I write to you) and it gets me actively moving my body which is good for me. I love to wear earbuds and listen to music or Podcasts as I work, so it is a moment where I can step away from my life responsibilities and refuel my mind and spirit while accomplishing a gardening task like pruning, checking on water lines and levels, or checking for pests. Know that you’ll benefit as well in the same way; research tells us that those who garden are happier. I’m also getting a good dose of Vitamin D from that sunshine and producing melatonin which both help your immune system. I have a college degree and could work in any corporate setting, but I have purposely chosen this natural permiculture and hydroponic organic method of growing food, because it is healthier for me physically, mentally, and emotionally. Plus, it is something a can do with my children, teaching them how plants grow and why they should grow them. I am sowing into not only myself, but the next generation.
Background Image credit: Kim Kight Moda Fabric Nov 2021 Release
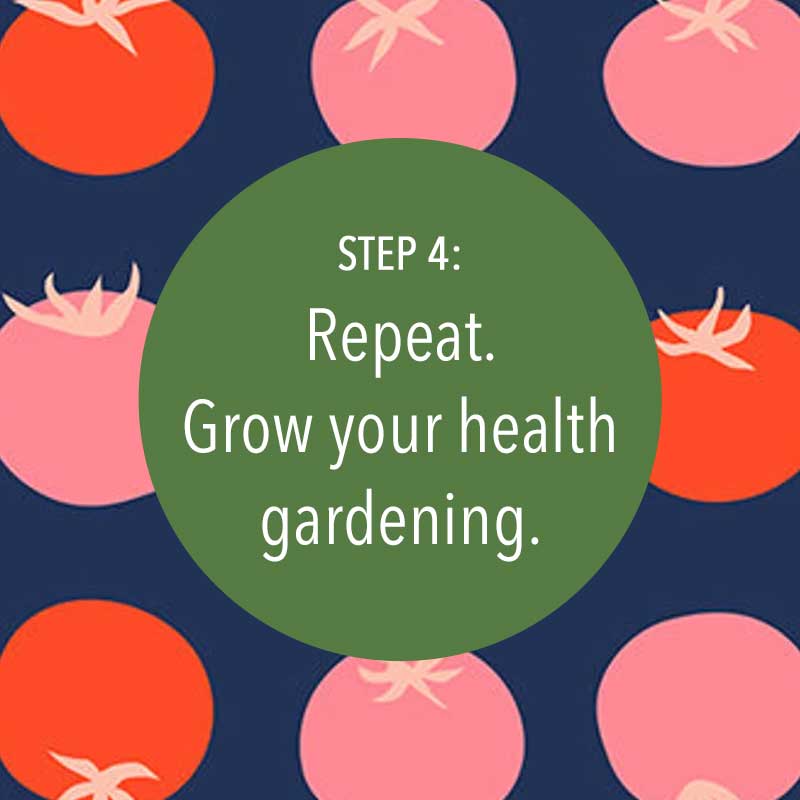
Step 4: Repeat.
After you’ve finished the growing cycle of your plant and have accessed how it went in your gardening journal, repeat the process the next season. Pick another type of plant you’re interested in learning more about and pursue it. But here’s the cool thing… because you have already learned how to grow that other plant, you can now choose another variety within that same plant group and grow it AND the new plant you’re interested in learning more about. As you repeat this process season after season, before you know it, you’re growing a whole slew of healthy plants and enjoying reaping the benefits!
Let us know which plant you’re curious about and plan on learning more this year in the comments below!
Happy growing,
Erin
Erin Castillo is the owner of Grow Your Health Gardening and Lead Grower of GYHG Seed Co. She is certified in hydroponics and growing food using organic methods. She believes that life is to be lived to the fullest.
Beauty Lottringa growing on the vine. Such a pretty tomato!
We are loving eating BLTs (Bacon, Lettuce + Tomato with Mayo on a slice of bread) fresh from the garden with tasty hydroponically-grown heirloom tomatoes! (So juicy!)
And this rare variety from Russia called Beauty Lottringa makes a tasty AND beautiful plating! Can you believe that each tomato has less than five seeds in it?! WOW! I personally love how each slice looks like a red flower.
Slice of Beauty Lottringa on a BLT Sandwich. This variety only has about 5 seeds or less on average in each tomato!
BLT Sandwich with Black Passion and Beauty Lottringa featured in photo above. To shop all our hydroponic-adapted exclusive line of seeds visit store.growyourhealthgardening.com
I’m still debating on whether to sell this variety because of the low seed count, but I may end up doing a giveaway, so be sure to visit store.growyourhealthgardening.com and sign-up for our email updates and tips to be the first to hear when our new hydroponically-adapted line of seeds release or if we do a give-away on this particular variety.
Do you love BLTs as well? What is your favorite slicer variety?
April is “Gardening with Kids Month” where the industry focuses on encouraging young people to learn more about growing food at home. I wanted to join in on this topic, because I feel it’s so important to teach the next generation about how to grow food. And here’s the best part — you don’t have to know everything about growing food to do it. It’s fun to learn together! If you’re interested in gardening with your children, hopefully our story will inspire you in your journey…
A little bit about my background and knowing a little something about gardening with kids…
As some of you might know, I am a mother to five (5) amazing souls — I am blessed, despite battling PCOS, to have identical twin sons who are now 20 years old, another son who is 16, another son who is 11, and a daughter who is now 8 years old.
When my twins were going into 5th grade, my husband and I felt led to homeschool our three boys (our other two littles had not yet been born.) I left a good paying career in marketing to dive into something totally foreign to me… educating my own children. I felt strongly that I only had my children for a season and I didn’t want to be so distracted with wealth-building that I missed the greatest wealth right in my arms — my children.
Thinking back on that time period, I was very involved in our sons’ education. I volunteered at their school and knew the Principal by name. I knew our sons had a lot of potential, but they were struggling in an environment where they were expected to sit at a desk all… day… l-o-n-g. We hit a breaking point, when I learned one day my son had not been out to recess in over a month, I was not only livid, but I knew that to continue doing the same thing and not getting the results you wanted was not the answer. I remember at the time that I got together with a small group of moms from our church to scrapbook each month and it just so happened that when we met that evening at my house that it coincided with learning my son hadn’t had any time to move his body and play at school for over a month. There was this mama in our group that had homeschooled one of her two children that asked, “Erin, have you considered homeschooling your boys?” Gasp! No! Who does that?
Slowly my friend began to share and open my eyes to the possibilities with homeschooling and she eventually took me to a homeschool expo that totally blew me away. There was so much I could do with my boys as far as teaching them that I was overwhelmed with the possibilities. Here I was, a college educated fully-capable woman who thought only trained “professionals” (aka: government school teachers) were equipped to teach children. How blinded I was by my own biases. It was one day while driving down the road when one of our boys in the back seat of our SUV dropped a swear word that my husband and I looked at each other and simultaneously said, “We’re homeschooling.” It was becoming more and more evident that their environment was impacting them more at school that our efforts were at home.
Taking the leap to homeschool felt like I was jumping off a high cliff into a deep pool of water, but looking back over these past decade of living life in this way IT IS THE BEST DECISION I’VE EVER MADE. My children went from doing life in silos, to doing life together. We focused on developing character and growing in relationships just as much as reading, writing and arithmetic. But alas, I digress. Back to how we used gardening to grow our children…
When I began to teach our sons, I saw first-hand what their teachers had complained about — the high distractibility and the difficulty focusing on tasks for any length of time. Even I was a bit surprised at how hard it was for them to get through a subject. Here I was taking out of school because they didn’t fit the mould and at home, I was just making it look like what they came out of doing because that was what was familiar to me. Doing the same thing over and over again, while expecting different results is akin to insanity, so this SANE mama gave herself permission to step outside the box, society had placed us in and begin to do what was best for my children even if it looked different than what the government school was doing. So I began to deep dive in to figure out how my sons best learned as individuals with the aim to change them from fidgety fifth graders to fantastic focused learners!
At the time, I had joined a homeschool group where one of the moms offered a Classical Education / Charlotte Mason group out of her home where Mom’s met once every couple of weeks on a Saturday to discuss the book, “The Well-Trained Mind” by Susan Wise-Bauer and Jessie Wise. [Get on Amazon]. One of the big take-aways from those wonderful group of mamas with a heart for their children was to simply get children outdoors. And this ended up be the perfect place for me to start with my active young sons.
We encourage our children to explore this amazing world around us and respect the creatures they discover. All five of my children have brought me various critters they have discovered (here a skink) and I take a picture for posterity before they release their catch back into the yard or wild. Photo: Follow us on Instagram @GrowYourHealthGardening
Tap your child’s natural curiosity and imagination through exploring the outdoors
So one of the big take-aways this Charlotte Mason / Classical Education type group focused on was our ability as a parent to tap into the natural curiosity of our child / children and the outdoors is the PERFECT place to spark the imagination and wonder of a child. One of the ways we can do this is through nature walks. Prior to going on our nature walk (aka hike), we would equip our children with a task to find one object that was simply interesting to them. They were only to collect one item, nothing more. Of course, the beauty of this was it didn’t have to be limited to a hike — in fact, when I had a newborn in my arms, I would send the boys out into our fenced back yard for a certain length of time with instructions to bring back something that caught their eye as interesting. Sometimes it was an oddly colored or shaped rock. Maybe it was a leaf. Or a bug. Or moss and a uniquely shaped branch. Or some other type of critter like a skink. The goal of the exercise was simple — get them out from behind a desk and get their body moving and their eyes open to the world around them.
Something amazing happened. They were able to come in and sit down and stay focused on their task. I was a believer in this learning method. We had found something that worked!
I would call them in and we would set on the back deck or at the kitchen table and discuss as a family what they had found. This helped their linguistics and built confidence talking about what they thought and gave me insight into what they found to be interesting. One son loved moss (interestingly he ended up having a moss garden as a teen) and another son liked a frog (which totally Next, I had a simple set (like 7 colors) of water colors and brushes with water in solo cups for each child and a small 6 x 6 piece of blank water color paper. The instructions were simple… paint what you see. And the most important part — I did it with them. You might be wondering, Erin, why didn’t you have them use a sketch pad and sketch paper? Well, in using water colors, a child learns how different colors interact with each other. They learn how colors can blend and layer upon one another for a certain affect. They learn how to pay attention to detail — to not only the color hue of whatever object they are examining, but even down to how the light hits that object and creates a shadow. It was okay if it wasn’t perfect. We weren’t aiming for perfection — we were simply observing and trying to communicate visually what we saw and orally what we had observed. The two step process of letting them move their bodies, find what is fascinating to them, and then slowing down and paying attention to detail showed me that my children could indeed focus. Without any drugs. Without missing any recess. And learning about the amazing world right out our back and front doors.
My youngest son (age 10 in this photo), brings in our hydroponic cucumber harvest. This variety is Ashley Cucumber and hydroponic-adapted seed can be found in our Grow Your Health Gardening (GYHG) Seed Co. store. Photo: Follow us on Instagram @GrowYourHealthGardeningOur son, Joshua, shows just how big our kale harvest was off of one Tower Garden last spring when it was at it’s full production mode. We processed all this kale freezing some for healthy smoothies and making some into healthy kale chips which my kids love as a snack. Photo: Follow us on Instagram @GrowYourHealthGardening
Understanding how a child learns and helping them make connections is key
And the beauty of this ‘learning method”, if you will, is you are using both sides of the child’s brain. Very young children in particular are very right-brain hemisphere dominant, especially during their first three years of life. According to the book “The Whole Brained Child: Revolutionary Strategies to Nurture Your Child’s Developing Mind” by M.D. Siegel and Ph.D., Bryson, you want to encourage cross-brain learning functions whenever possible. [Get the book] They write, “We want to help our children become better integrated so they can use their whole brain in a coordinated way. For example, we want them to be horizontally integrated, so that their left-brain logic can work well with their right-brain emotion. We also want them to be vertically integrated, so that the physically higher parts of their brain, which let them thoughtfully consider their actions, work well with the lower parts, which are more concerned with instinct, gut reactions, and survival. … What molds our brain? Experience.”
We want to help our children become better integrated so they can use their whole brain in a coordinated way. For example, we want them to be horizontally integrated, so that their left-brain logic can work well with their right-brain emotion. We also want them to be vertically integrated, so that the physically higher parts of their brain, which let them thoughtfully consider their actions, work well with the lower parts, which are more concerned with instinct, gut reactions, and survival. … What molds our brain? Experience.”
When using watercolors and painting, you are tapping right brain creativity, but in giving them the task of looking and remembering detail, you are tapping left brain logic. If you have a child that asks “why” all the time (I remember my mother getting exasperated with me at one point because I was this kind of child), know it’s their left-brain wanted to know the linear cause-effect relationship in the world and to express that logic through language. It is a blessing to have a “why” asking child as they are wanting to make connections and learn!
Siegel and Bryson I think would agree with this outdoor Charlotte Mason / classical education method of learning for they write, “…children whose parents talk with them about their experiences tend to have better access to the memories of those experiences.” So, getting in the habit of engaging a child by focusing on the world outside your front or back door is key in engaging and inspiring these kinds of conversations. What I found over time is when they were older, they were able to have some very grown-up conversations with adults to discuss their experiences and relate to people in a way their peers didn’t seem to be doing. In their high school years, I also saw a richness to what they wrote about as they drew from these memories and made connections to the world around them on a bigger scheme. My middle 16 year old son, who was given time outside from first grade on to explore his world continues to BLOW ME AWAY at times with the connections he makes with literature and history right now as a homeschooling Junior in high school. And he writes poetry for fun… again… I’m blown away by him and his creative mind that taps into the logic of what he is perceiving about the world around him.
Children will watch what you do and follow your lead
I know what I’ve mentioned here is not specific to gardening, but as we were doing every day life, this kind of learning was adapted to what I was doing — growing food. For example one day, my son, Joshua, noticed me saving some seed from some fruit I had processed from the grocery store. I would set these seeds on a tray in the corner of my kitchen to dry and save. Soon, I noticed my seeds were being added to by someone else in the family. Other seeds being added to my drying area. Come to find out, Joshua had taken notice of my actions and he was inspired. He saved seeds I would have never tackled! I remember he saved a mango seed one time and actually grew it into a tree! (It was doing great until it was left outside on a cold night [sad face]). Today, Joshua has graduated for Seed Saving School from the Seed Savers Exchange and is a great help in isolating, pollinating, collecting and processing seed for our Grow Your Health Gardening Seed Co.
Joshua collects basil seed off of our hydroponic system. Photo: Follow us on Instagram @GrowYourHealthGardening
Involve your children in what you’re learning or curious about
If your children see you learning and inquisitive, they will see that learning isn’t limited to school — learning is for adults, too — it’s an attitude. And a mind that continually learns is a good thing. I didn’t want to only teach my children reading, writing and arithmetic and science — I wanted them to learn how to learn. I knew if they had the skills to find the information they didn’t know, they could learn anything whether I was there or not. And I had the honor and priviledge of being that example to them from a very young age.
If your children see you learning and inquisitive, they will see that learning isn’t limited to school — learning is for adults, too — it’s an attitude.
—Erin Castillo, Grow Your Health Gardening
Here, one of my twins finishes potting up various pots to learn about root growth and development as part of a lesson on aerial root pruning. Photo: Follow us on Instagram @GrowYourHealthGardening
When my twins were about 8th and 9th grade, I began to really get intrigued by this idea of hydroponics. I was tired of fighting the Georgia clay soil. I would amend it and invariably it was never enough, because the very next season it always returned to clay. And then I fought the weeds. Oh the weeds! As a busy mom of five at this point, I didn’t have the band-width to be out watering the garden and weeding day in and day out. I was doing good just to feed them three square meals a day and get their lessons done. There just wasn’t enough of me to go around it seemed and so our little gardening patch suffered as a result. But I missed growing food and I was determined to find an easier solution. So, when I say I dove in to learning more about hydroponics, I mean a full-head-long plunge. I watched videos, read articles, purchased books, attended workshops. I immersed myself in learning whatever I could find on the subject online and from the library, new books and old books. (Even still today I listen to podcasts and read to learn more.)
There was a YouTube video by a gentleman that particularly caught my eye. He was growing tomatoes in bato-buckets. It was a gravity fed circular system and it fascinated me. I was astounded at how simple the system was while getting seemingly high production out of the plants he was growing. I wanted to see if what he was claiming was true, so I talked my husband into helping me and the boys build a simple system. As part of their High School Biology class, I incorporated some botany since they were studying the differences between plant cells and animal cells. I had the older boys track the pH levels and PPM levels using some meters I had picked up from the hydroponics store in Atlanta. I was amazed at how the tomatoes thrived and the parsley and basil flourished! And I didn’t have to weed or water a single thing! I just had to make sure my reservoir was full and nutrients and pH were in range every couple of days or so during the hottest days of the season. We had tomatoes and herbs growing until our first snow that year! I was impressed! I was hooked!
We didn’t just stop at the hydroponics for learning… we dove in and even did other types of labs. For example, we did one on how different pots affected root growth through air pruning. In this exercise, our sons learned that roots need oxygen to grow and how air pruning will strengthen a plant through encouraging lateral root development. The more roots your plant has, the more it can uptake nutrients you offer it whether in soil or in a hydroponic/aeroponic system.
Our then 7 year old daughter holding hydroponically grown Rainbow Swiss Chard. I had to move some things around in my Tower Garden and we both learned that day that Rainbow Swiss Chard has roots that are the same color as the stalk! How cool is that?! Photo: Follow us on Instagram @GrowYourHealthGardening
The rest is history as some would say… we have explored all sorts of growing systems using water including aquaponics, the Aerogardens, and my go-to-favorite, the vertical garden growing system the Tower Garden (full disclosure, I am a Rep as well because I love it so muchand I want Mama’s to succeed in growing healthy food for their family!) Since this all began, I now hold certifications in hydroponics, aquaponics, seed starting, a graduate from the SSE Seed School and more. Joshua (the son who was and still is a seed saver) can now take any orchid and rescue it, bringing it back to it’s intended beauty. And, as far as I know, he is also the youngest to become a Master Gardener in our county.
I am so thankful for our local County Extension Office — they have been an excellent resource to our family as we have learned over the years and grown. I will talk more about this resource in upcoming articles and how you can tap into it for FREE! Here Joshua holds an azalea plant he won for attending a local workshop. Photo: Follow us on Instagram @GrowYourHealthGardeningTower Gardens were a game-changer for how much food we could grow in a small space. Here, we grew over 100 plants on our back deck. Photo: Follow us on Instagram @GrowYourHealthGardening
And the learning hasn’t stopped with just my sons as they’ve graduated from High School and have moved on to other things. My younger children keep me going. One recent example has come out of a book I read which made me want to get better at growing flowers in my garden. I began to follow a gardener from Virginia (also in zone 7, so similar growing conditions to where I live in Atlanta, GA), Lisa Mason-Ziegler. I picked up her book “Vegetables Love Flowers: Companion Planting for Beauty and Bounty“. In this book, she talks about how important the flowers are to the food bearing plants in the garden — not simply for pollination, but for bringing in natural predators and balancing the ecosystem. I would play her Facebook live events while I worked on my own seed starting. There’s always something new you can learn…
Be watchful of what delights your child and then be purposeful…
It was around this time-frame where I was listening to Lisa and working in the garden that my then 7-year-old daughter ran up to me with a clutch-full of Dandelions and wild Violets. Then a thought fluttered through my mind… she loved flowers so much that she brought them to me to share her joy in them. How could I join her in that?If I could combine that desire to pick flowers she had with my desire to grow more flowers … and that led to growing two flower beds last season of sunflowers and zinnias. My husband financially backed my hair-brained idea and generously gave me some sunflower seeds and kits from Lisa Ziegler’s shop for Mother’s Day. I was so tickled to dive right in and do this project with my daughter.
Throughout the growing season, she learned so much about how plants grow and what flowers needed after they were picked to extend their vase life. We even learned how you can use lemon basil or cinnamon basil as filler in your arrangement and it makes it smell divine! My favorite part was when we would go out to pick flowers together she would be stripping off lower leaves and say, “Mom, thank you so much for helping me plant a flower garden.” Kid you not — this is forever engrained in my mind as a special moment we would share. And she didn’t just say it once, but multiple times throughout the season. I knew we were onto something that was working!
In looking back on last season, I think it also gave her something a little bit different than what I was doing (growing food) that she could make her own. It was HER flower patch to pick from anytime she wanted. She may not understand for a long while that I was intentional about all that, but that’s okay. The spark of learning about flower growing has been lit and my job is to fan the flames of learning and supporting that interest. She and I both find great delight not only in bringing bouquets in to our home and making our home environment beautiful, but also sharing with neighbors and those who need encouragement.
As I write this, in our upcoming growing season she is growing more cool season annuals. What’s more, she is dreaming and talking about one day owning a flower and gift shop. Will she do that? I hope so… I love the idea of encouraging entrepreneurship, but what I love more is she is learning about how plants grow and finding joy in the journey. She is learning through gardening. And the best part is, I am blessed to get to do that right along side her. We grow in relationship as mother and daughter doing something we both love — she can be mimicking my example of growing plants, but make it her own by it being her own little patch to nurture and enjoy.
Like Siegel and Bryson mentions in their book, “Spending time with family and friends and learning about relationships, especially with face-to-face interactions, will wire it in yet other ways. Everything that happens to us affects the way the brain develops…This wire-and-rewire process is what integration is all about: giving our children experiences to create connections between different parts of the brain. When these parts collaborate, they create and reinforce the integrative fibers that link difference parts of the brain.”
—Siegel and Bryson “The Whole-Brain Child: Revolutionary Strategies to Nurture Your Child’s Developing Mind
Our seven-year-old daughter waters in her Sunflower and Zinnia transplants while her big brother, Joshua, helps with finishing touches to the flower bed. I love how gardening brings our family together. Photo: Follow us on Instagram @GrowYourHealthGardening
Here’s the main thread through all these years with my children… we had fun growing in relationship with each other and learning about the world we live in along the way. My children are more connected to where their food comes from and why they should eat those greens I put on their plate, because we have reached out the world outside our front door and have brought it into our lives. They have learned a life skill in how to grow food — they can be independent and self-sufficient in a world with a burdened food system where people rely on large scale agricultural farming practices. When Covid hit and grocery stores were bare, we had food growing and didn’t feel fearful. We felt empowered. They have developed some great character traits in patience and now understand the work that went into the food that is on their plate making them more appreciative of others and our hard-working farmers. These are just some of the great things gardening has brought to our family and I’m only getting started…
I’ll stop there for now, because there’s more I’d like to share about teaching children to grow their own food, but hopefully that will give you an idea of a little bit of our journey as a family and how I approach involving children in the garden… more to come… but for now the garden calls me with our 2021 seed season ramping up. (My children are finished with their math and ready for a break so we are all headed outside for a bit.) Let me know if you have learned something through gardening with your child in the comments below. I love to hear from you!
Chat with you again soon…
— Erin
PS: A special thank you to my help mate and best friend — my husband, who has supported me every step of the way. Love you.
Erin Castillo is a certified hydroponic grower, small-scale farmer outside of Atlanta, Georgia, and owner of Grow Your Health Gardening Seed Co.. She loves to share her passion for helping others grow healthier lives through connecting with people she loves while also growing nutritious food.
It turns out that we have some Irish in our lineage (about 20% they say), so as one of my oldest sons played his bag pipe I thought to myself… hey! We should offer a 20% off sale on our seeds in honor of our Irish heritage and the work that St. Patrick did to influence his world for the better those many years ago!
This time of year, many a gardener will begin breaking out their seeds from storage and gather up their recent purchases in preparation for the upcoming growing season. With earnest, one cell tray or by one rock wool at a time, life will begin inside the gardener’s abode, protected from the cold weather outside.
Seed starting, used to be an annual event for me until I realized the importance of succession planting. If I wanted to have a continual supply of greens or move from one season to the next seamlessly, a little bit of planning was all I needed to do the trick.
If I was going to do succession planting, I needed to make it part of my everyday planting and tending tasks (even if all it means is a quick glance to check moisture levels or that your “babies” (as I affectionately call them) are growing as they should was the only task that day.) And as an everyday task, it needed to be part of my environment. The end result to succession planting throughout the year? A seed starting station.
If you’re only planting seeds one time a year, I encourage you to read on and challenge yourself to look at seed starting in a whole new light (pun intended). We want to set you up for success for the ENTIRE growing season ahead!
What is a Seed Starting Station?
Okay, I’m probably being “Captain Obvious” here, but a Seed Starting Station contains everything you need to start seeds. If I may recommend a few tips as you consider setting up your own Seed Starting Station:Your Seed Starting Station needs to be in a location where you walk by it at least once a day; two times or more a day is even better. Why? Seedlings need nurturing. Watching that they have proper light, temperature, moisture, and humidity levels are all key to successful strong seed starts.
Your Seed Starting Station need to have the proper temperature.
Temperatures do matter with germination and each seed / plant has different temps they prefer to germinate at and a “sweet spot” temperature range. For example, warm season plants typically prefer to germinate at temps above 65ºF. On the flip side, cool season plants, typically prefer to germinate at cooler temps. Spinach, for example, can be started in a container between two wet paper towel sheets in the refrigerator and after about 7-10 days you’ll see the root emerge. At this point, you can move it into soil or a wet rock wool and allow it to continue to grow into a young seedlings under bright light while maintaining high 60º-low 70ºF temps.
Seed heat mats can be a great tool for warming soil or rock wool when you set a tray on it. Just be careful to not overheat the young seeds. A thermostat on your heat mat can keep it in the proper range. Below is a quick cheat sheet for common veggies of optimal temperatures seeds typically germinate at:
Minimum (F)
Optimum Range (F)
Optimum (F)
Maximum
Beet
40º
50º-85º
85º
85º
Cabbage
40º
45º-95º
85º
100º
Cauliflower
40º
45º-85º
80º
100º
Celery
40º
60º-70º
70º
85º
Chard
40º
50º-85º
85º
95ª
Cucumber
60º
60º-95º
95º
105º
Eggplant
60º
75º-95º
90º
100º
Lettuce
35º
40º-80º
75º
85º
Melons
60º
75º-95º
90º
100º
Onion
35º
50º-95º
75º
95º
Parsley
40º
50º-85º
75º
90º
Pepper
60º
65º-95º
85º
95º
Pumpkin
60º
70º-90º
90º
100º
Spinach
35º
45º-70º
70º
85º
Squash
60º
70º-95º
95º
100º
Tomato
50º
70º-95º
85º
95º
Source: PennState Extension. Adapted from Kemble and Musgrove (2006) (Soil temperatures should be taken by inserting a soil thermometer 3-4 inches deep into the soil surface and noting temperature.
Your Seed Starting Station Needs Bright Light
Seedlings need a lot of light once they emerge — a nice bright strong light. If you don’t have a green house that can be temperature controlled for heat and cool air, you will need to grow your seedlings indoors. That means you will need artificial lighting intended for growing plants. Lighting could get real technical quick, so I’m going to try to keep it simple. When it comes to lighting and seed starting you need to keep three things in mind to make adjustments as needed to ultimately save money on seeds:
INTENSITY: You need to have enough lighting. • LED bars: 8–10 inches apart from each other • T5 fluorescents: 4–5 inches apart from each other
COVERAGE: You need to place lighting in the sweet spot — not too far from seedlings. • LED bars (like Phillips): 8–12 inches away from seedlings • T5 fluorescents: 5–6 inches away from seedlings
DURATION: You need to leave lights on long enough. 14-18 hrs a day
Your light needs to be bright (this is like the one we use) and you need to have a way to adjust the light so that it is the correct distance from the seedling. And if you’re planting into a hydroponic growing system where your seedling will mature into an adult plant, you’ll want lights that can be adjusted distance-wise from the plant (closer when they are young and further away about 8″-10″ when they are older). If you’re using a Tower Garden HOME or Tower Garden FLEX, these are the lights you will want to invest in as they can be adjusted from the plant as it grows and they have a built in timer making it easy to set it and go about your life never having to worry about the lights turning on and off again.
Don’t rely on a window with sun coming in as it will make your seedlings “leggy” where they stretch for the light and ultimately that makes them weaker plants as they mature. Today’s windows have a UV rating which actually blocks the essential UV light that seedlings crave. The window is designed to protect your home interior textiles such as the furniture, drapes, and carpet from fading — it is not taking into account seed germination needs at all.
Some love to say “You can just start your seedlings in your Tower Garden — I do it all the time.” A couple of cautionary words are needed when you hear or read this advice posted in social media groups. Simply, don’t do it. Seedlings started in this manner often become leggy and are overall weaker plants when they mature. Secondly, you can “burn” your tender seedling with high levels of nutrients that other mature plants may be getting within your growing system, as seedlings don’t require as much nutrients when they are teeny tiny. Remember to, instead, start your seedlings off strong in a Seed Starting Station under bright grow lights. Look for a light that has all the color spectrum of the sun and avoid cheap $20-$30 grow lights as they are just not strong enough for seedlings to thrive. We recommend a grow light like this that has a full-spectrum. A decent grow light for seedlings will cost between $60-$100. I’ve also used my Aerogarden Harvest as a light for seedlings when I don’t have anything growing in the ports.
You’ll want to keep a quick reference to the needs of different seeds.
Not all seeds need darkness or to be covered to begin the germination process. Some require light to germinate like lettuce. Some need to be scarified (slightly chipped) or go through a cold period before they will germinate. We recommend printing off our Seeds That Require Special Treatment Reference Chart and laminating it or sticking it in a 3-ring binder sheet protector to use as a quick reference (or just bookmark our reference page and come back to it as you need to).
Click above screen shot to access full list of seeds that have special requirements to germinate.
Your Seed Station needs to have supplies relating to starting seeds and nurturing stored nearby
Here’s a list of some common supplies I use for soil and a list for common supplies I use for hydroponics.
Hydroponics: • 1.5″ rock wool • bowl for soaking rock wool • vermiculite for seeds that need to be covered (see our list here if you’re unsure) • liquid kelp (I add a TBSP to my water soak) • seeds you intend to plant (those that are not in the freezer) • plant tags • permanent marker • access to a water source and/or some sort of watering can to “water in” seeds • and a tray of some sort (I use an old cookie sheet) to rest your starts upon under lights for easy moving around from under your grow light to outdoors as temps allow or to your indoor growing system. • heat mat with temp gauge • grow light
Soil: • Seed starting tray cells, recycled containers that can be repurposed as small pots, or small paper pots • potting mix or screened peat moss • worm castings (to mix into your potting mix) (Note: don’t purchase and ship during hot months as temps of 85ºF in shipment will begin to kill beneficial bacteria in castings.) • access to a water source and/or some sort of watering can to “water in” seeds • seeds you intend to plant (those that are not in the freezer) • plant tags • permanent marker • and a tray to rest your seed starts on and move them easily from under your grow light to outdoors as temps allow. • heat mat with temp gauge • grow light
Now to the best part. Your own personal produce section!
To have a continual harvest, you’ll want to implement a sequential planting system. Pick a day that you are at your leisure (i.e.: Sundays are usually a restful day for most folks) and put a reminder on your calendar to plant at a certain time every week or every two weeks paying attention to your growing conditions (i.e.: indoor, cool season, warm season) and available space.
Let’s say you want to have a continuous supply of Bibb Lettuce. If you have a 28 port Tower Garden, you can plant 4 rock wools with Bibb Lettuce seed making sure to include a couple extra seeds per rock wool of which you’ll thin down as they germinate to the strongest one. You’ll repeat this process, planting several lettuce seeds into a single rock wool cube, filling four cubes total. As shown in the below planting chart, by week 4, your week 1 seedlings will be ready to transfer into your system. With each passing week, you’ll put the four seedlings that are ready from previous week plantings into the next row up of your vertical hydroponic / aeroponic Tower Garden. By week 10, you will have harvested your row 1 Bibb Lettuce (four ports = four heads of bibb lettuce to feed a typical family of four for a week). Once your lower lettuce has been harvested (pulled out of the port), the following week, replace the net pots and wipe down the port entrance with a cotton ball with alcohol on it and put a new clean net pot in it’s place. You are ready to plant the next set of four seedlings in these empty ports. As you continue to harvest up the vertical garden, you will clean each port and then plant the next seedling into it.
Note, if you are growing outdoors, sequential planting will get trickier, because temperature will be a variable. As temps raise towards summer time, bibb lettuce will begin to bolt (or go to seed) quicker or go limp if it is not a heat tolerant variety. This type of sequential planting works best if growing greens indoors and if the green has a 6-week grow cycle. This could work for Bok Choy and most greens. Consider putting some herbs like chives in the top row… these are cut and come again meaning that once they are a certain height, you can start cutting them 3″-4″ from the base of the plant and they will continue to grow from the center. Keep in mind that at some point, you will need to clean your system and restart the process, but in theory, if growing indoors, plants should continue to grow at a steady rate if you get in the habit of planting enough to fill four ports each week.
BIBB LETTUCE OR BOK CHOY EXAMPLE OF SEQUENTIAL PLANTING SCHEDULE FOR 1 TOWER GARDEN WITH 28 PORTS:
Week 1
Week 2
Week 3
Week 4
Week 5
Week 6
Week 7
Start 4 cubes w/seeds
Start 4 cubes w/seeds
Start 4 cubes w/seeds
Start 4 cubes w/seeds
Start 4 cubes w/seeds
Start 4 cubes w/seeds
Start 4 cubes w/seeds
Trans-plant into Tower Garden…
Week 1 seedlings Btm Row 1 of TG
Week 2 seedlings Btm Row 2 of TG
Week 3 seedlings Btm Row 3 of TG
Week 4 seedlings Row 4 of TG
Copyright 2021 Grow Your Health Gardening
Week 8
Week 9
Week 10
Week 11
Week 12
Week 13
Week 14
4 cubes w/seeds
Start 4 cubes w/seeds
Start 4 cubes w/seeds
Start 4 cubes w/seeds
Start 4 cubes w/seeds
Start 4 cubes w/seeds
Start 4 cubes w/seeds
Week 5 seedlings Row 5 of TG
Week 6 seedlings Row 6 of TG
Week 7 seedlings Row 7 of TG
Week 8 seedlings Row 1 of TG
Week 9 seedlings Row 2 of TG
Week 10 seedlings Row 3 of TG
Week 11 seedlings Row 4 of TG
Harvest off of btm row 1 lettuce
Harvest off of btm row 2 lettuce
Harvest off of btm row 3 lettuce
Harvest off of btm row 4 lettuce
Harvest off of btm row 5 lettuce
Copyright 2021 Grow Your Health Gardening
No matter what you want to grow, evaluate about how long the plant(s) you want to grow take to get to maturity for harvest, calculate when it will be ready for consumption, and enjoy your bounty continuously throughout the season with weekly seed starting in your own personal Seed Starting Station.
Happy Growing! — Erin
PS: Be sure to post your pics of your Seed Starting Station on social media and tag us at #gyhg and maybe you’ll get featured on our Instagram or Facebook channels and get some FREE seeds!
I was listening to a podcast by one of my favorite market growers from Alabama, Noah Sanders, and he had a guest on from Kaleva, (Northern) Michigan, Craig Shaaf, from Golden Rule Farm who mentioned that he put red dye in an empty soda bottle and it helped his tomatoes mature earlier than anyone else’s tomatoes in the area while also sighting a Clemson University Study.
So, being that we drink a lot of sparkling water in our house, I had an empty liter lying around (we typically repurpose these for terrariums in cold hardy annuals but that’s a something to discuss for another day), so I filled it with some water and added several drops of red food coloring to it and sat it on my indoor Tower Garden near some micro dwarf unripened cherry tomatoes I was growing. Low and behold, two days later, the cherry tomatoes closest to the red-colored water began to ripen from the bottom up!
Red reflective Far-Red light encourages tomatoes to ripen.
Studies using Red Plastic Selective Reflecting Mulch (SRM) Show Increased Yields for Certain Plants
Research originally started during the 1980s and led to development of SRM-Red, a selective reflecting mulch that has been available commercially since 1996. Plant physiologist Michael J. Kasperbauer, who retired from the Agricultural Research Service‘s (ARS) Coastal Plains Soil, Water and Plant Research Center at Florence, S.C. found that plastic colored-mulch’s controlling factor is not the colors themselves, but how the colors adjust the amount of blue light and the ratio of far-red (FR) to red light that plants receive reflecting from the ground upwards.
The studies used a red plastic mulch (also referred to as Selective Reflecting Mulch, or SRM for short). It is similar to black plastic mulch used frequently by growers to help warm the soil, prevent erosion, and retains moisture. The red plastic mulch is often thinner than most black weed block and allows more light (and sometimes weeds) through it.
But red plastic mulch’s true strength is in its ability to reflect certain red light waves back onto the growing plant, thereby accelerating fruit production and increasing overall yields. Past ARS work showed that red plastic mulch produced larger tomatoes and produced 20% more than black plastic mulch counterparts and the red plastic mulch also sweeter-smelling, better-tasting strawberries.
Similar results were found on peppers and eggplants as well as with lettuce.
ARS’ also tried the red plastic mulch with cotton, carrots and basil. They found that color of the plastic mulch can affect the roots, stems, leaves and seeds, as well as the fruits, of many other food and crop plants.
Research on cotton showed that cotton fibers grew longer in bolls exposed to increased FR-to-red light ratios. Another study, on carrots, showed that concentrations of nutrients and compounds such as vitamin C and beta carotene in the roots of food crops could be changed by reflecting the right waves of color onto the plants’ leaves.
What’s more, in studies with basil, the amounts of blue, red and FR light reflected onto developing leaves affected their size, aroma and concentration of soluble phenolics. The phenolics are natural compounds, including tannins and pigments that can induce color, some flavors and odors, and antioxidant activity.
Basil leaves developing above red mulches had greater area, succulence and fresh weight than those developing above black mulch. When grown above yellow and green mulches, basil leaves developed significantly higher concentrations of aroma compounds and phenolics than did those of plants grown above white and blue mulches.
The concept of colored mulch sprouted when Kasperbauer wondered whether phytochrome was equally distributed in leaves. He became curious about what would happen if light impinged on the leaf’s lower, rather than upper, surface. “The plant response was the same, no matter which surface received the light,” says Kasperbauer. “Although that experiment seemed somewhat unconventional in 1962, it became highly relevant about 22 years later, when we determined that red and FR reflected from the soil surface could act through the plant’s phytochrome system to enhance yield and quality. That led to our colored-mulch work.”
Red Plastic Selective Reflecting Mulch (SRM) helps to Deter Nematodes
What’s more, tests done by USDA’s plant physiologist Michael J. Kasperbauer and Clemson University nematologist Bruce Fornum showed that nematode damage can be lessened by red plastic mulch. They did an interesting study where they planted tomatoes into sterile soil — some rows covered in black plastic mulch and some covered in red plastic mulch. They then inoculated both rows with 0-200,000 nematode eggs. Their findings showed the black mulch produced 8 pounds of tomatoes whereas the red mulch produced 17 pounds! That’s roughly a 113% increase in yield battling the same conditions.
USDA’s Agricultural Research Service found that red plastic mulch suppresses root nematode damage to tomatoes because the light reflection keeps more of the plant’s growth above ground. The plant’s energy goes into developing fruit and foliage, rather than roots. Nematodes feed on roots. The far-red light reflection to the above-ground plant draws away nutrients from the roots – and nutrients away from the nematodes. Fewer roots mean less food for nematodes. Less food = fewer nematodes.
Things to Consider When Using Red Plastic Selective Reflecting Mulch (SRM)
Carefully secure red plastic selective reflecting mulch underneath your plants so that there is at least a foot on every side of the plant in it’s mature stage of growth.
Do not place the red plastic selective reflecting mulch in walking paths as it is thinner than other weed blocking materials.
Consider placing a weed block material underneath your red plastic SRM to help limit weeds from growing underneath.
Drip irrigation will be necessary underneath
Two other Bonus Tips for Boosting Flavor in Tomatoes:
Place 1-2 TBSP of pure natural Molasses in a gallon of water and stir well to dilute it down and place into a spray bottle and spray your leaves. This will aid in bringing out flavor in your tomatoes.
When your tomatoes are about 18″ tall, a little bit of stress at times can really boost flavor as well. Spray your plants about every 2 weeks with 1 standard strength 325 mg uncoated aspirin tablet mixed in a gallon of water and mix well until the aspirin is completely dissolved and then spray the tomato leaves with the aspirin solution (Salicylic Acid) to trigger tomato defenses. This will especially really beef up your Beef Steak varieties and boost the flavor profile as well.
Find Red Plastic Selective Reflecting Mulch for your Tomato, Pepper, Eggplant, Basil, Cotton, and Lettuce (and more) Crops