Tag Archives: gardening

You can Grow (and save) Some Green This St. Patrick’s Day!

It turns out that we have some Irish in our lineage (about 20% they say), so as one of my oldest sons played his bag pipe I thought to myself… hey! We should offer a 20% off sale on our seeds in honor of our Irish heritage and the work that St. Patrick did to influence his world for the better those many years ago!

From today, Wednesday March 10, 2021 through midnight on St. Patrick’s Day, March 17, 2021, you can save 20% when you spend $17* on all heirloom seeds in the shop. (And if you spend $25, you still get free shipping for a limited time.) That includes our exclusive line of hydroponic-adapted seeds that are perfect for hydroponic / aeroponic / aquaponic growers (that’s just for you Tower Garden, Farm Stand, and Aerogarden, Bato Bucket, and DIY Hydroponic home growers!)

https://store.growyourhealthgardening.com/

Be sure to check out our growing line of micro-dwarf tomatoes as well! They’re very popular so buy now before they are sold out!

Hope you have a fantastic growing season ahead!

Erin

How to Have Your Own Personal Produce Aisle in Your Own Home

This time of year, many a gardener will begin breaking out their seeds from storage and gather up their recent purchases in preparation for the upcoming growing season. With earnest, one cell tray or by one rock wool at a time, life will begin inside the gardener’s abode, protected from the cold weather outside.

Seed starting, used to be an annual event for me until I realized the importance of succession planting. If I wanted to have a continual supply of greens or move from one season to the next seamlessly, a little bit of planning was all I needed to do the trick.

If I was going to do succession planting, I needed to make it part of my everyday planting and tending tasks (even if all it means is a quick glance to check moisture levels or that your “babies” (as I affectionately call them) are growing as they should was the only task that day.) And as an everyday task, it needed to be part of my environment. The end result to succession planting throughout the year? A seed starting station.

If you’re only planting seeds one time a year, I encourage you to read on and challenge yourself to look at seed starting in a whole new light (pun intended). We want to set you up for success for the ENTIRE growing season ahead!

What is a Seed Starting Station?

Okay, I’m probably being “Captain Obvious” here, but a Seed Starting Station contains everything you need to start seeds. If I may recommend a few tips as you consider setting up your own Seed Starting Station:Your Seed Starting Station needs to be in a location where you walk by it at least once a day; two times or more a day is even better. Why? Seedlings need nurturing. Watching that they have proper light, temperature, moisture, and humidity levels are all key to successful strong seed starts.

Your Seed Starting Station need to have the proper temperature.

Temperatures do matter with germination and each seed / plant has different temps they prefer to germinate at and a “sweet spot” temperature range. For example, warm season plants typically prefer to germinate at temps above 65ºF. On the flip side, cool season plants, typically prefer to germinate at cooler temps. Spinach, for example, can be started in a container between two wet paper towel sheets in the refrigerator and after about 7-10 days you’ll see the root emerge. At this point, you can move it into soil or a wet rock wool and allow it to continue to grow into a young seedlings under bright light while maintaining high 60º-low 70ºF temps.

Seed heat mats can be a great tool for warming soil or rock wool when you set a tray on it. Just be careful to not overheat the young seeds. A thermostat on your heat mat can keep it in the proper range. Below is a quick cheat sheet for common veggies of optimal temperatures seeds typically germinate at:

Minimum (F)Optimum Range (F)Optimum (F)Maximum
Beet40º50º-85º85º85º
Cabbage40º45º-95º85º100º
Cauliflower40º45º-85º80º100º
Celery40º60º-70º70º85º
Chard40º50º-85º85º95ª
Cucumber60º60º-95º95º105º
Eggplant60º75º-95º90º100º
Lettuce35º40º-80º75º85º
Melons60º75º-95º90º100º
Onion35º50º-95º75º95º
Parsley40º50º-85º75º90º
Pepper60º65º-95º85º95º
Pumpkin60º70º-90º90º100º
Spinach35º45º-70º70º85º
Squash60º70º-95º95º100º
Tomato50º70º-95º85º95º
Source: PennState Extension. Adapted from Kemble and Musgrove (2006)
(Soil temperatures should be taken by inserting a soil thermometer
3-4 inches deep into the soil surface and noting temperature.

Your Seed Starting Station Needs Bright Light

Seedlings need a lot of light once they emerge — a nice bright strong light. If you don’t have a green house that can be temperature controlled for heat and cool air, you will need to grow your seedlings indoors. That means you will need artificial lighting intended for growing plants. Lighting could get real technical quick, so I’m going to try to keep it simple. When it comes to lighting and seed starting you need to keep three things in mind to make adjustments as needed to ultimately save money on seeds:

INTENSITY: You need to have enough lighting.
LED bars: 8–10 inches apart from each other
T5 fluorescents: 4–5 inches apart from each other

COVERAGE: You need to place lighting in the sweet spot — not too far from seedlings.
LED bars (like Phillips): 8–12 inches away from seedlings
T5 fluorescents: 5–6 inches away from seedlings

DURATION: You need to leave lights on long enough.  14-18 hrs a day

Your light needs to be bright (this is like the one we use) and you need to have a way to adjust the light so that it is the correct distance from the seedling. And if you’re planting into a hydroponic growing system where your seedling will mature into an adult plant, you’ll want lights that can be adjusted distance-wise from the plant (closer when they are young and further away about 8″-10″ when they are older). If you’re using a Tower Garden HOME or Tower Garden FLEX, these are the lights you will want to invest in as they can be adjusted from the plant as it grows and they have a built in timer making it easy to set it and go about your life never having to worry about the lights turning on and off again.

Don’t rely on a window with sun coming in as it will make your seedlings “leggy” where they stretch for the light and ultimately that makes them weaker plants as they mature. Today’s windows have a UV rating which actually blocks the essential UV light that seedlings crave. The window is designed to protect your home interior textiles such as the furniture, drapes, and carpet from fading — it is not taking into account seed germination needs at all.

Some love to say “You can just start your seedlings in your Tower Garden — I do it all the time.” A couple of cautionary words are needed when you hear or read this advice posted in social media groups. Simply, don’t do it. Seedlings started in this manner often become leggy and are overall weaker plants when they mature. Secondly, you can “burn” your tender seedling with high levels of nutrients that other mature plants may be getting within your growing system, as seedlings don’t require as much nutrients when they are teeny tiny. Remember to, instead, start your seedlings off strong in a Seed Starting Station under bright grow lights. Look for a light that has all the color spectrum of the sun and avoid cheap $20-$30 grow lights as they are just not strong enough for seedlings to thrive. We recommend a grow light like this that has a full-spectrum. A decent grow light for seedlings will cost between $60-$100. I’ve also used my Aerogarden Harvest as a light for seedlings when I don’t have anything growing in the ports.

You’ll want to keep a quick reference to the needs of different seeds.

Not all seeds need darkness or to be covered to begin the germination process. Some require light to germinate like lettuce. Some need to be scarified (slightly chipped) or go through a cold period before they will germinate. We recommend printing off our Seeds That Require Special Treatment Reference Chart and laminating it or sticking it in a 3-ring binder sheet protector to use as a quick reference (or just bookmark our reference page and come back to it as you need to).

Click above screen shot to access full list of seeds that have special requirements to germinate.

Your Seed Station needs to have supplies relating to starting seeds and nurturing stored nearby

Here’s a list of some common supplies I use for soil and a list for common supplies I use for hydroponics.

Hydroponics:
1.5″ rock wool
• bowl for soaking rock wool
• vermiculite for seeds that need to be covered
(see our list here if you’re unsure)
liquid kelp (I add a TBSP to my water soak)
seeds you intend to plant (those that are not in the freezer)
plant tags
permanent marker
• access to a water source and/or some sort of watering can to “water in” seeds
• and a tray of some sort (I use an old cookie sheet) to rest your starts upon under lights for easy moving around from under your grow light to outdoors as temps allow or to your indoor growing system.
heat mat with temp gauge
grow light

Soil:
• Seed starting tray cells, recycled containers that can be repurposed as small pots, or small paper pots
• potting mix or screened peat moss
worm castings (to mix into your potting mix) (Note: don’t purchase and ship during hot months as temps of 85ºF in shipment will begin to kill beneficial bacteria in castings.)
• access to a water source and/or some sort of watering can to “water in” seeds
seeds you intend to plant (those that are not in the freezer)
plant tags
permanent marker
• and a tray to rest your seed starts on and move them easily from under your grow light to outdoors as temps allow.
heat mat with temp gauge
grow light

Now to the best part. Your own personal produce section!

To have a continual harvest, you’ll want to implement a sequential planting system. Pick a day that you are at your leisure (i.e.: Sundays are usually a restful day for most folks) and put a reminder on your calendar to plant at a certain time every week or every two weeks paying attention to your growing conditions (i.e.: indoor, cool season, warm season) and available space.

Let’s say you want to have a continuous supply of Bibb Lettuce. If you have a 28 port Tower Garden, you can plant 4 rock wools with Bibb Lettuce seed making sure to include a couple extra seeds per rock wool of which you’ll thin down as they germinate to the strongest one. You’ll repeat this process, planting several lettuce seeds into a single rock wool cube, filling four cubes total. As shown in the below planting chart, by week 4, your week 1 seedlings will be ready to transfer into your system. With each passing week, you’ll put the four seedlings that are ready from previous week plantings into the next row up of your vertical hydroponic / aeroponic Tower Garden. By week 10, you will have harvested your row 1 Bibb Lettuce (four ports = four heads of bibb lettuce to feed a typical family of four for a week). Once your lower lettuce has been harvested (pulled out of the port), the following week, replace the net pots and wipe down the port entrance with a cotton ball with alcohol on it and put a new clean net pot in it’s place. You are ready to plant the next set of four seedlings in these empty ports. As you continue to harvest up the vertical garden, you will clean each port and then plant the next seedling into it.

Note, if you are growing outdoors, sequential planting will get trickier, because temperature will be a variable. As temps raise towards summer time, bibb lettuce will begin to bolt (or go to seed) quicker or go limp if it is not a heat tolerant variety. This type of sequential planting works best if growing greens indoors and if the green has a 6-week grow cycle. This could work for Bok Choy and most greens. Consider putting some herbs like chives in the top row… these are cut and come again meaning that once they are a certain height, you can start cutting them 3″-4″ from the base of the plant and they will continue to grow from the center. Keep in mind that at some point, you will need to clean your system and restart the process, but in theory, if growing indoors, plants should continue to grow at a steady rate if you get in the habit of planting enough to fill four ports each week.

BIBB LETTUCE OR BOK CHOY EXAMPLE OF SEQUENTIAL PLANTING SCHEDULE FOR 1 TOWER GARDEN WITH 28 PORTS:

Week
1
Week
2
Week
3
Week
4
Week
5
Week
6
Week
7
Start
4 cubes
w/seeds
Start
4 cubes
w/seeds
Start
4 cubes
w/seeds
Start
4 cubes
w/seeds
Start
4 cubes
w/seeds
Start
4 cubes
w/seeds
Start
4 cubes
w/seeds
Trans-plant into Tower Garden…Week 1 seedlings Btm Row 1 of TGWeek 2 seedlings Btm Row 2 of TGWeek 3 seedlings Btm Row 3 of TGWeek 4 seedlings Row 4 of TG
Copyright 2021 Grow Your Health Gardening
Week
8
Week
9
Week
10
Week
11
Week
12
Week
13
Week
14
4 cubes
w/seeds
Start
4 cubes
w/seeds
Start
4 cubes
w/seeds
Start
4 cubes
w/seeds
Start
4 cubes
w/seeds
Start
4 cubes
w/seeds
Start
4 cubes
w/seeds
Week 5 seedlings Row 5 of TGWeek 6 seedlings Row 6 of TGWeek 7 seedlings Row 7 of TGWeek 8 seedlings Row 1 of TGWeek 9 seedlings Row 2 of TGWeek 10 seedlings Row 3 of TGWeek 11 seedlings Row 4 of TG
Harvest off of btm row 1 lettuceHarvest off of btm row 2 lettuceHarvest off of btm row 3 lettuceHarvest off of btm row 4 lettuceHarvest off of btm row 5 lettuce
Copyright 2021 Grow Your Health Gardening

No matter what you want to grow, evaluate about how long the plant(s) you want to grow take to get to maturity for harvest, calculate when it will be ready for consumption, and enjoy your bounty continuously throughout the season with weekly seed starting in your own personal Seed Starting Station.

Happy Growing!
— Erin

PS: Be sure to post your pics of your Seed Starting Station on social media and tag us at #gyhg and maybe you’ll get featured on our Instagram or Facebook channels and get some FREE seeds!

how red can boost your production by 20% percent + two ways to enhance flavor in your tomatoes

I was listening to a podcast by one of my favorite market growers from Alabama, Noah Sanders, and he had a guest on from Kaleva, (Northern) Michigan, Craig Shaaf, from Golden Rule Farm who mentioned that he put red dye in an empty soda bottle and it helped his tomatoes mature earlier than anyone else’s tomatoes in the area while also sighting a Clemson University Study.

So, being that we drink a lot of sparkling water in our house, I had an empty liter lying around (we typically repurpose these for terrariums in cold hardy annuals but that’s a something to discuss for another day), so I filled it with some water and added several drops of red food coloring to it and sat it on my indoor Tower Garden near some micro dwarf unripened cherry tomatoes I was growing. Low and behold, two days later, the cherry tomatoes closest to the red-colored water began to ripen from the bottom up!

Red reflective Far-Red light encourages tomatoes to ripen.

Studies using Red Plastic Selective Reflecting Mulch (SRM) Show Increased Yields for Certain Plants

Research originally started during the 1980s and led to development of SRM-Red, a selective reflecting mulch that has been available commercially since 1996. Plant physiologist Michael J. Kasperbauer, who retired from the Agricultural Research Service‘s (ARS) Coastal Plains Soil, Water and Plant Research Center at Florence, S.C. found that plastic colored-mulch’s controlling factor is not the colors themselves, but how the colors adjust the amount of blue light and the ratio of far-red (FR) to red light that plants receive reflecting from the ground upwards.

The studies used a red plastic mulch (also referred to as Selective Reflecting Mulch, or SRM for short). It is similar to black plastic mulch used frequently by growers to help warm the soil, prevent erosion, and retains moisture. The red plastic mulch is often thinner than most black weed block and allows more light (and sometimes weeds) through it.

But red plastic mulch’s true strength is in its ability to reflect certain red light waves back onto the growing plant, thereby accelerating fruit production and increasing overall yields. Past ARS work showed that red plastic mulch produced larger tomatoes and produced 20% more than black plastic mulch counterparts and the red plastic mulch also sweeter-smelling, better-tasting strawberries.

Similar results were found on peppers and eggplants as well as with lettuce.

ARS’ also tried the red plastic mulch with cotton, carrots and basil. They found that color of the plastic mulch can affect the roots, stems, leaves and seeds, as well as the fruits, of many other food and crop plants.

Research on cotton showed that cotton fibers grew longer in bolls exposed to increased FR-to-red light ratios. Another study, on carrots, showed that concentrations of nutrients and compounds such as vitamin C and beta carotene in the roots of food crops could be changed by reflecting the right waves of color onto the plants’ leaves.

What’s more, in studies with basil, the amounts of blue, red and FR light reflected onto developing leaves affected their size, aroma and concentration of soluble phenolics. The phenolics are natural compounds, including tannins and pigments that can induce color, some flavors and odors, and antioxidant activity.

Basil leaves developing above red mulches had greater area, succulence and fresh weight than those developing above black mulch. When grown above yellow and green mulches, basil leaves developed significantly higher concentrations of aroma compounds and phenolics than did those of plants grown above white and blue mulches.

The concept of colored mulch sprouted when Kasperbauer wondered whether phytochrome was equally distributed in leaves. He became curious about what would happen if light impinged on the leaf’s lower, rather than upper, surface. “The plant response was the same, no matter which surface received the light,” says Kasperbauer. “Although that experiment seemed somewhat unconventional in 1962, it became highly relevant about 22 years later, when we determined that red and FR reflected from the soil surface could act through the plant’s phytochrome system to enhance yield and quality. That led to our colored-mulch work.”

Red Plastic Selective Reflecting Mulch (SRM) helps to Deter Nematodes

What’s more, tests done by USDA’s plant physiologist Michael J. Kasperbauer and Clemson University nematologist Bruce Fornum showed that nematode damage can be lessened by red plastic mulch. They did an interesting study where they planted tomatoes into sterile soil — some rows covered in black plastic mulch and some covered in red plastic mulch. They then inoculated both rows with 0-200,000 nematode eggs. Their findings showed the black mulch produced 8 pounds of tomatoes whereas the red mulch produced 17 pounds! That’s roughly a 113% increase in yield battling the same conditions.

USDA’s Agricultural Research Service found that red plastic mulch suppresses root nematode damage to tomatoes because the light reflection keeps more of the plant’s growth above ground. The plant’s energy goes into developing fruit and foliage, rather than roots. Nematodes feed on roots. The far-red light reflection to the above-ground plant draws away nutrients from the roots – and nutrients away from the nematodes. Fewer roots mean less food for nematodes. Less food = fewer nematodes.

Things to Consider When Using Red Plastic Selective Reflecting Mulch (SRM)

  • Carefully secure red plastic selective reflecting mulch underneath your plants so that there is at least a foot on every side of the plant in it’s mature stage of growth.
  • Do not place the red plastic selective reflecting mulch in walking paths as it is thinner than other weed blocking materials.
  • Consider placing a weed block material underneath your red plastic SRM to help limit weeds from growing underneath.
  • Drip irrigation will be necessary underneath

Two other Bonus Tips for Boosting Flavor in Tomatoes:

  1. Place 1-2 TBSP of pure natural Molasses in a gallon of water and stir well to dilute it down and place into a spray bottle and spray your leaves. This will aid in bringing out flavor in your tomatoes.
  2. When your tomatoes are about 18″ tall, a little bit of stress at times can really boost flavor as well. Spray your plants about every 2 weeks with 1 standard strength 325 mg uncoated aspirin tablet mixed in a gallon of water and mix well until the aspirin is completely dissolved and then spray the tomato leaves with the aspirin solution (Salicylic Acid) to trigger tomato defenses. This will especially really beef up your Beef Steak varieties and boost the flavor profile as well.

Find Red Plastic Selective Reflecting Mulch for your Tomato, Pepper, Eggplant, Basil, Cotton, and Lettuce (and more) Crops

Better Reds Red Mulch for Tomato Growth

4′ x 100′ Roll of Grower’s Solution Red Plastic Mulch
[Click to Get]
4′ x 50′ Roll of Grower’s Solution Red Plastic Mulch
[Click to Get]
3′ x 24′ Roll of Red Plastic Mulch
[Click to Get]

Sources:

• “Colored Mulch Can Help Cotton, Carrots—and Basil, Too” by Luis Pons
September 5, 2003 https://www.ars.usda.gov/news-events/news/research-news/2003/colored-mulch-can-help-cotton-carrots-and-basil-too/
• “Review: Red Plastic Mulch for Tomatoes –Does It Make a Difference?http://www.tomatodirt.com/red-plastic-mulch.html
• “More than Meets the Eye: New Findings on How Mulch Color Can Affect Food PlantsUSDA ARS Online Magazine Vol. 51, No. 9
• “Color of Light Reflected to Leaves Modifies Nutrient Content of Carrot Roots” by George F. Antonious* and Michael J. Kasperbauer USDA
• “Colored Mulch Starves NematodesUSDA agresearchmag.ars.usda.gov/ar/archive/1997/oct/mulch1097.pdf

Planning Your Garden: Part 1

Thank you for a fantastic year! We have wrapped up another season and are preparing for the next even as I pause to write this I am working on our own plans for the upcoming growing season.

Let’s begin with the essentials.
What is your goal in growing your own food?

As we coach others in growing their own food for themselves and their families, I’ve realized that each person has a different reason for growing food. And that’s actually the first thing to sit down and reflect upon… what motivates you to grow food?

I’ll use myself as an example to get the wheels turning for you hopefully…

“I grow food because…”

My spouse and I need to eat more greens and veggies to be our healthiest. Having greens and veggies growing in our home and in our yard brings a convenience that the store just can’t provide. We jokingly say that we “shop” from our own produce aisle right outside our door — and once you get a taste for that kind of freedom there’s no going back. Nurturing those that you love the most is my main motivation!
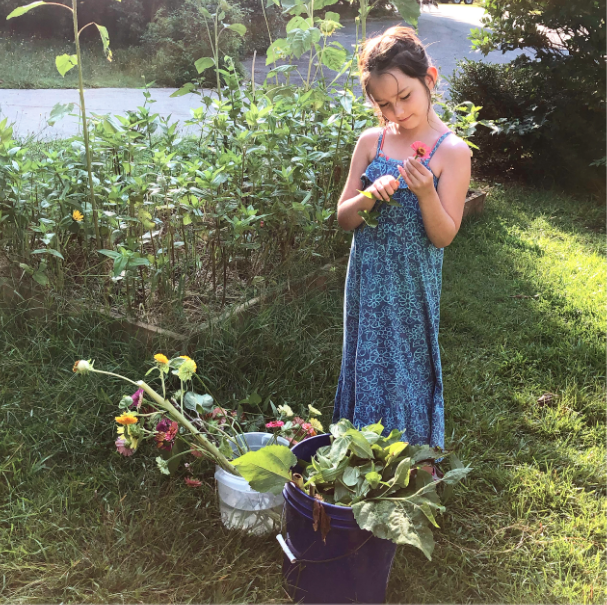
My main reason for growing our own food is pictured right here — the love of my life and the best of men!


We want our children to learn to eat these same foods so they will develop good healthy habits. We know that children who participate in growing their own food tend to eat that food because they are more connected to it.

Our 8 year-old daughter watering the Sugar Snap Peas. The Extension Office didn’t think we could grow them in the fall in our zone, but we went for it anyway and enjoyed some tasty Sugar Snap Peas through the fall cool season! Growing food alongside your children connects them to their food and they also learn patience, persistence, how to grow that particular food, and healthy habits.


We want to know what is on our food. We had relied on convenience-based foods for too long. Couple that with food grown for mass market and we had those chemicals going into our body. How do I know? Because I was diagnosed with PCOS many years ago and research has shown these chemicals are also hormone disruptors. As we’ve grown our own food and limited chemicals in our environment, PCOS symptoms have decreased. So, if I grow my own food, I know what is literally, going into my body and those that I love. And that brings not only health, but peace-of-mind.

I want my daughter to have a fighting chance when it comes to PCOS. Teaching her now that by doing life a little differently, she can life holistically and be healthy despite the odds against her of also having PCOS.


We want the maximum nutrition from our food. When I realized that the produce I was buying had traveled thousands of miles and was on average 10-days old by the time it hit our plates and mouths, I knew from other studies that the plant was losing nutritional benefits with every day it went from point A to point B and point C. Further, the produce that is mass-marketed is not picked at it’s peak maturation (because travel time to market has to be factored in.) Since it’s picked early, it is not at it’s maximum nutrition. If we grow our own, we can pick at it’s full maturity and consume right away, thereby getting the MOST nutritional benefit from what we are eating.

Have you ever tried home-grown celery? It tastes AMAZING! Much stronger celery taste than in the store-bought celery. Picking a plant at it’s peak maturation has health and taste benefits!


We save money in the long run. Growing your own food does have a cost, (so does eating nutrient deficient food) but when you have a family of seven and five of those eating male adult portions, organic greens, fruits and vegetables quickly add up and end up being more expensive than the effort to grow yourself. One head of organic lettuce goes for about $4 a head in our local grocery store. If instead, I purchase one pack of lettuce seeds, for that $4, I get about 25 pelleted seeds. If I plant a few seeds every week, I would have continuous lettuce and if 20 of those pelleted seeds grow to maturation, I would have saved $40 over the course of time. What could I do with an extra $40 in my pocket? Buy more seed!

The hydroponic aeroponic vertical garden Tower Garden growing system does an amazing job of growing greens. We looked at it as an investment and purchased ours several years ago. They continue to work fantastic and is my preferred method for growing food.


It provides our family with food security. When we went through the Covid Pandemic self-quarantine, we quickly realized what a blessing it is to have the know-how to grow your own food and the tools in place to have that fresh supply of food. It brings peace-of-mind knowing that we could provide food for our family without worrying what other germs might be on the food we were purchasing, who had handled it previously, if it had been cleaned properly, or if there would even be food available. All those concerns others were experiencing, never affected us, because we had already altered our way of living so it was a natural flow to our day and lifestyle. What’s more, any extra in our harvests can be saved for future use through freezing, canning or dehydrating with a little planning. Some call it homesteading. Some call it self-sufficiency. It’s just our new normal and we’ve learned to re-prioritize things in life to accommodate our desire to produce good clean nutritious food.

Yummy cucumber relish!


Growing our own food provides for those in need. Even with a large family, we purposely plan for extra to share with widows and those who may not have as much. We are to treat others the way we would like to be treated. I may not always have extra money to give to someone, but I can certainly share from my harvest to encourage them emotionally as well as meet their physical need of food.

A bag full of green lettuce ready to be delivered. We freeze a recycled soda water liter of water and put it in a medium size cooler and after our greens have chilled down a bit in the refrigerator, we pop the heads of lettuce into the cooled cooler and they transport beautifully to whoever we are giving them to and stay fresh.


It naturally lends itself to grow our family-run Seed Company Business. Seeds can be collected from the food that we grow for our family to utilize. Nothing is wasted. What’s even more important is intentionally choosing a home-based business model that fits our goal of being the primary ones to raise our children which includes at the fore-front educating them. A farm and garden is a great tool for teaching valuable life skills and helps our children grow into healthy adults.


Growing our own food fits into our lifestyle and supports our other food systems. As we prune and process, any excess can be given to our chickens and good green waste given to our worms. The worms provide worm waste which believe it or not provides beneficial bacteria for our plants. It is all interconnected and with a little tweaks to our daily routines, is totally feasible.

Our chickens enjoying a special treat — cilantro! I plant extra just for my hard working girls, because I know they love it and it grows well here in the SE.


Gardening brings enjoyment to life — it helps us try new things and satiates our love of always learning something new. Take for instance our 2020 challenge. My son and I decided to try growing watermelons in the shape of a heart… and it worked! We are tweaking a few things and will try again next season hoping the next watermelon variety will have fewer seeds.

I love a good challenge! I told my son that I wanted to try growing a heart-shaped sugar baby watermelon this past season and we successfully did it! We are currently trying various varieties and my son has figured out some tricks along with way for growing them. Try something new — gardening is fun!

So, before you trying growing your first seed, determine WHY you want to grow food in the first place. This will help direct you in the next step… HOW to determine what to grow (based on your “why”) and your available growing space.

Live your best life today and happy growing!

—Erin

Garden Poetry | “The Seven Of Pentacles” by Marge Piercy

The Seven Of Pentacles

Under a sky the color of pea soup
she is looking at her work growing away there
actively, thickly like grapevines or pole beans
as things grow in the real world, slowly enough.
If you tend them properly, if you mulch, if you water,
if you provide birds that eat insects a home and winter food,
if the sun shines and you pick off caterpillars,
if the praying mantis comes and the ladybugs and the bees,
then the plants flourish, but at their own internal clock.

Connections are made slowly, sometimes they grow underground.
You cannot tell always by looking what is happening.
More than half the tree is spread out in the soil under your feet.
Penetrate quietly as the earthworm that blows no trumpet.
Fight persistently as the creeper that brings down the tree.
Spread like the squash plant that overruns the garden.
Gnaw in the dark and use the sun to make sugar.

Weave real connections, create real nodes, build real houses.
Live a life you can endure: Make love that is loving.
Keep tangling and interweaving and taking more in,
a thicket and bramble wilderness to the outside but to us 
interconnected with rabbit runs and burrows and lairs.

Live as if you liked yourself, and it may happen:
reach out, keep reaching out, keep bringing in.
This is how we are going to live for a long time: not always,
for every gardener knows that after the digging, after
the planting,
after the long season of tending and growth, the harvest comes.

Marge Piercy

Never miss a facebook live video again with our learning library of archived videos

Grow Your Health Gardening Facebook Live Video Library Archive

Now you can find all our Facebook Live Videos on one page for easy reference and learning.

To view visit https://growyourhealthgardening.wordpress.com/facebook-live-table-of-contents-learning-library/

If you have a specific question that you would like to ask, feel free to add in the comments below and we will be sure to answer them in the next Facebook Live Wednesday Walk Through Event mark your calendar for Wednesday, June 24 at 7 am Eastern (Atlanta, GA).

Here is the direct link if you want to add it to your Facebook Event reminders: https://www.facebook.com/events/588882825369499/
And be sure to visit our Facebook Page on that day and time to view the Facebook Live Video! Be sure to like and share with friends who are interested in growing their own food to grow their health!

Thanks y’all!

— Erin

Grow What You Know: Planning your upcoming Tower Garden

New to growing your own food in a Tower Garden? First off, kudos on your decision to take control of your own health and it all starts at the foundational level of the food we put into our body.  It actually can go even deeper than that… it all starts with the parent plant that made the seed that we collect and then grow and then harvest to put into our body.  But I digress…

When considering what to put into your Tower Garden, there are certain vegetables and herbs that grow well together. I have grouped these plants based on shared PPM (parts per million) values. You will need a PPM meter to measure what your water’s PPM is with the nutrient solution added.

When determining our list below, we look for areas where PPM levels share common ground (see blue vertical bars to highlight overlapping plant PPMs)… Note: this PPM reference chart is available in full for all our Tower Garden and hydroponic clients, but here’s a little snippet:

PPM Chart for Hydroponics Tower Garden

Note that some plants can tolerate higher levels of nutrients than mentioned here as these are ideal ranges for growth. You’ll know when a plant is getting too high a level when the edges of the leaves get a brown tint (called tip burn). Otherwise, know that these plant groupings are going to grow together fairly well at certain PPMs and that you can push some of the plants that are below the PPM level to the next level up in some cases…

  • based on the PPM of 775 and a pH of around 6.0, you could grow these plants together using the Tower Tonic Minerals Formula Parts A&B:
    Arugula, Artichoke, Basil, Calendula (petals of flower are edible), Cilantro/Coriander, Dandelion (leaves edible & root used in tea), Fennel, Lavender, Lemon Balm, Menarda (Bee Balm), Mustard Greens, Nasturtiums (leaves & flower are edible + plant deters some insects)Oregano, Pansies (flower petals are edible), Parsley, Rosemary, Sage, Thyme, Violas (petals of flower are edible)Watercress.
  • based on the PPM of 1000 and a pH of around 6.0, you could grow these plants together using the Tower Tonic Minerals Formula Parts A&B
    Artichoke, Basil, Chives, Fennel, Kale, Leek, Lemon Balm, Menarda (Bee Balm), Mustard Greens, Oregano, Parsley, Peas, Rosemary, Sage, Thyme, Watercress
    (Lettuce/Romaine may grow in this range as well, just watch for tip burn on the leaves — some varieties may tolerate the PPM level)
  • based on the PPM of 1265 and a pH of 6.0, you could grow these plants together using the Tower Tonic Minerals Formula Parts A&B:
    Artichoke, Beetroot, Bok Choy, Broad Bean (Fava Bean), Carnation (2′ tall, but petals of flower are edible), Cauliflower, Celery, Chives, Cucumber, Kale, Leek, Marjoram, Menarda (Bee Balm), Mustard Greens, Parsley, Peas, Purslane, Pumpkin, Spinach, Summer Squash, Strawberries and Swiss Chard, Turnip Greens, Water Cress, Watermelon, ZucchiniTower Garden Beginner Plants
  • based on the PPM of 1490 and a pH of around 6.5, you could grow these plants together using the Tower Tonic Minerals Formula Parts A&B:
    Beans, Beetroot, Bok Choy, Broad Bean (Fava Bean), Celery, Eggplant, Endive/Chicory, Chives, Cucumber, Kale, Melon, Mint, Okra, Hot Peppers or Sweet Bell Peppers (Note: Planting both near each other may result in cross-pollination if outdoors and open-pollinated by bees and your sweet peppers can get a bit of heat in the flavor department. If growing indoors and hand pollinating blooms, you should be fine.), Purslane, Pumpkin, Spinach, Summer Squash, Strawberries, Swiss Chard, Tomatillo, Tomato, Turnip Greens, Watermelon, Zucchini

    Remember to put larger plants like kale and those that vine like peas, cucumber, and nasturtiums towards the bottom and you’ll need a support next to the Tower Garden where the vines can continue to grow out and fruit. Taller plants go towards the top (like Celery and Rainbow Swiss Chard).Salad Tower Garden Tower Planting SchematicPlanting Schematic for Chef Tower Garden
  • based on the PPM of 1990 and a pH of around 6.5, you could grow these plants together using the Tower Tonic Minerals Formula Parts A&B:
    Beans, Beetroot, Broccoli, Brussels Sprouts, Cabbage, Dill, Hot Peppers, Sweet Bell Peppers, Tomatillo, TomatoKeep in mind that your squashes, watermelons, tomatillos, and tomatoes are going to be heavy “feeders” meaning they will drink up water and nutrients during the hotter summer days.

Kid Friendly Plants to Put in Tower Garden

Okay, so now you have an idea of what plants have similar growing PPM characteristics. Select one PPM group based on vegetables and herbs you like to use every day!

Assorted Green Salad
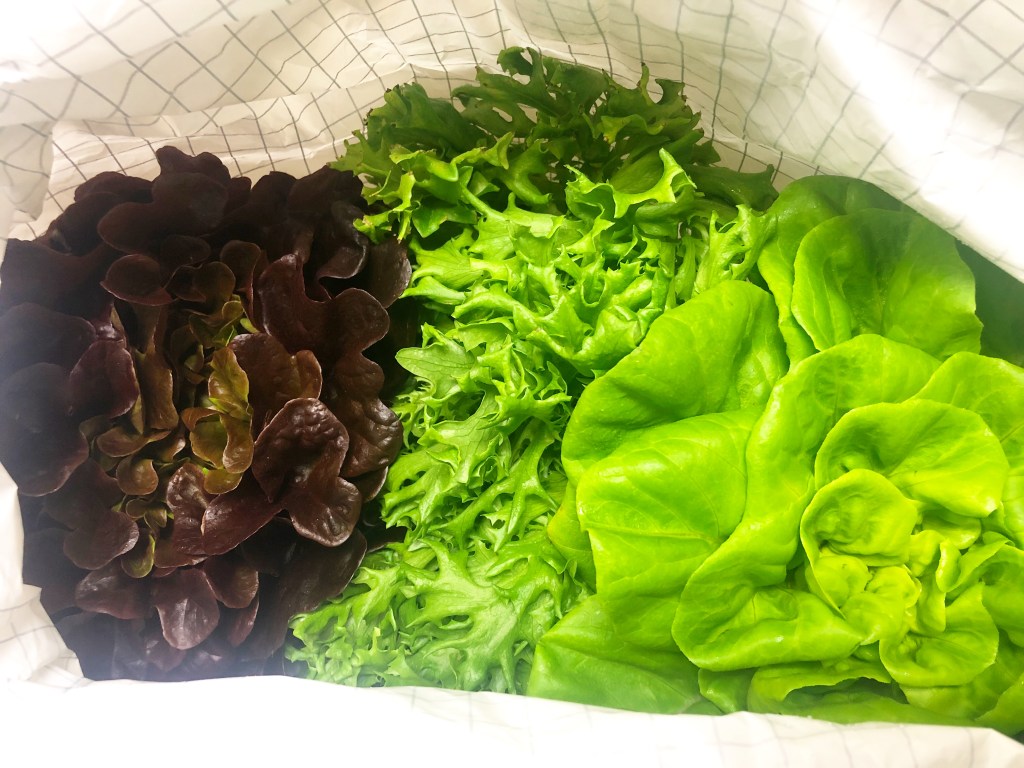
Keep in mind that for most of us, lettuce has to travel quite a ways if you’re purchasing it from a big box store especially. 70%+ of all romaine is grown in Salinas, California. That means that romaine has to travel roughly 3,000 miles to get to my plate here in Atlanta, Georgia. They say on average it takes 10 days for a harvested romaine to get from the farm to our dinner plate! This is unacceptable! Especially since we know from industry studies that due to respiration rates of plants, nutrient availability decreases within the first 24-48 hours! That translates into you losing out nutritionally on the very purpose of eating that salad! So, with that in mind, simply starting by growing greens is a great place to start. I also like greens because of they mature in 4-6 weeks meaning you get to see your success (and enjoy the fruit of your efforts) earlier rather than later.

The other thing to consider regarding a salad is the number of varieties you have probably never tried because the grocery store only carries 3-4 options. I have found that some of my best salads incorporate a variety of greens and textures. Have fun exploring greens you’ve never tried before — you might find you really like them fresh off of your Tower Garden. I had always shy’d away from Bok Choy in the grocery store because it looked limp and lifeless, but when I grew it in the Tower Garden it was super tasty and I learned that I could keep harvesting for 2 months until the plant flowered. Now it’s something I always plan on growing because it can be added to soups, quinoa, and salads.

If doing a greens selection to grow on your Tower Garden, I like to recommend my clients include a nasturtium on the lower part of their Tower Garden because a) you can eat both the leaves and the flower, b) most people have never tasted a nasturtium because they are not found readily in the grocery store and most often found on the fine diner’s plate, c) they are so pretty to look at on your tower and d) they are companion plants meaning they are good to grow next to other plants to help deter certain pests… When planted alongside cucumbers. eggplant, tomatoes, or squash plants, nasturtiums may repel cucumber beetles, whiteflies, aphids and squash bugs. There are other edible flowers in this range that would be fun to explore if you’re willing to be adventurous.

If you decide to do a vining crop with a higher PPM, keep in mind space (tip: put a trellis next to where the plant’s port is and it can grow off to the side. These vining plants are often water hogs and love the sun, so plan accordingly for anything planted above them — those plants will also need to be heat tolerant. I always recommend including a flowering plant as it will attract pollinators and pollinators (aka: bees) will plump up your fruit and leave your flowering plants in a better state than how they found it.

CC03128C-B0D7-4148-BC1E-A8C7B454653D
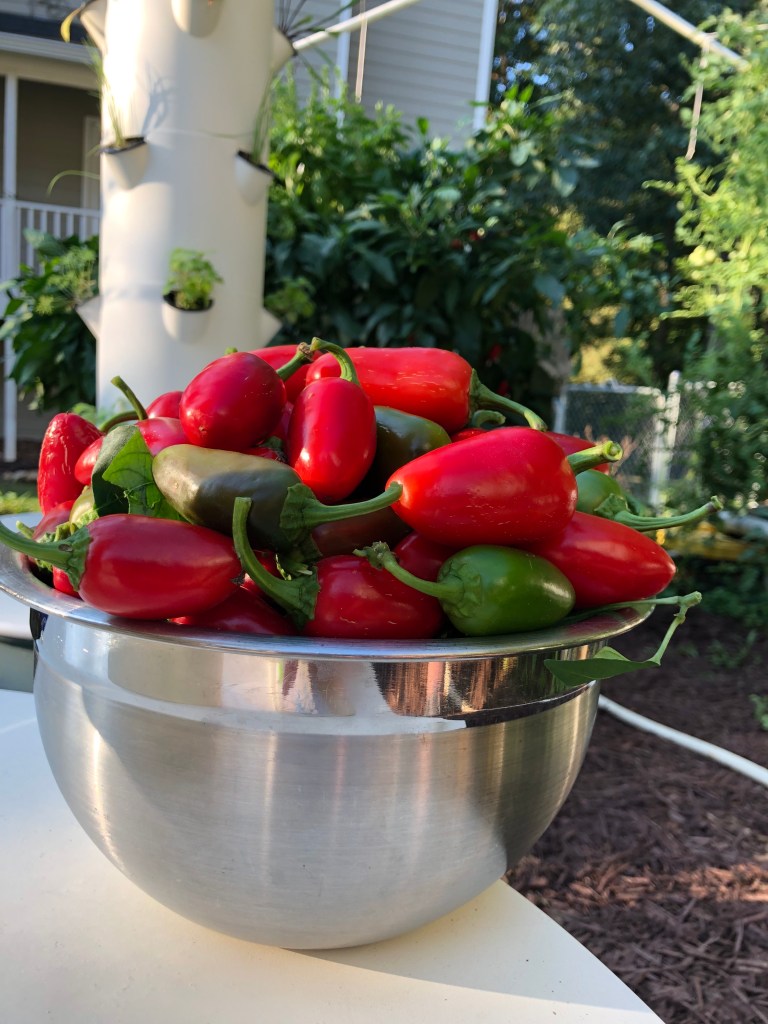
Tomatoes are the most popular thing to grow. Ideally, you’ll want to look for varieties that have compact traits, but if you do have room next to your outdoor Tower Garden, make sure you can handle the growth habit on a trellis. My favorite tomato is an heirloom variety, Cherokee Purple, and it’s vining can reach up to 10′ or more if it’s given the nutrients it loves. (And BOY do they taste AMAZING!!!!) Cherry Tomato varieties are going to be prolific, so plan a space to support their growing needs to you have airflow and are able to easily keep pests from moving in on your crop.

Tip: If you are putting large vining plants in the lower ports of your Tower Garden. Plant to the left, right and on the back side leaving the front port open. (You may want to cover that port with a rubber disc like this.) The reason for leaving the front port unplanted is you need access to your water reservoir opening and some vines take over and make it difficult to reach it.

Bowl of Jalapeño Peppers Hydroponically Grown

And my last thing to highlight is the pepper — remember that if you are growing outdoors and have hot peppers and sweet peppers both growing in your Tower Garden, you may get some cross-pollination through open-pollination and your sweet peppers might be hotter than their parent plants. It’s a good idea to just pick either hot peppers or sweet peppers if growing outdoors. Now if you’re growing indoors under lights, you can plant both hot and sweet in the same system in ports on opposite side of the Tower Garden because you will have to self-pollinate your flower buds anyway (turn a fan on to give your tower a light breeze or hand-pollinate with a toothbrush or paintbrush).

This should get your started. If you’re looking for Seed Providers, you can check out our article here.

Happy Planning!

— Erin

PS: If you want a printable version of the information above to print off and to use as a reference in your garden journal, simply click here: Growing by Common PPMs.

If you have found this information to be helpful, we appreciate any donation large or small to continue our research and to keep GrowYourHealthGardening.com available as a continued resource. Thank you!

Donate via Venmo

Our Son’s Journey Becoming a Master Gardener

I wanted this space here on Grow Your Health Gardening to be focused on how to grow food for the gardening novice, but today I wanted to pause and just reflect on something (or should I say someone) that is near and dear to my heart.

Last night, our family attended a beautiful catered banquet through our local County Extension Office Master Gardener Organization where our oldest son, Joshua, received his official Master Gardener Certificate and official name badge. He is the youngest Master Gardener in our county of 164,044 people (at the time of writing this post.) It was definitely a proud moment for me, his Mama, having watched him grow (pun intended) over the years in his passion and skills.

Joshua receiving his Master Gardener Certification

Of my five children, Joshua is the one that noticed me saving a seed every now and then. Soon, I was finding other seeds next to my collection and now he is a better seed saver than I am! He gets it. He understands that within that seed is life and the potential to keep giving life-giving food to others he loves.

I sometimes call him “Farmer Josh” out of love because he loves to play in the dirt and grow things. We come from a long line of wheat farmers. Joshua’s middle name is fitting, because he is actually named after his Great Grandfather who was a dry land wheat farmer. (Growing wheat definitely isn’t Joshua’s future because we learned he was allergic to wheat dust one year while helping out with the harvest.) Every summer, my family would help bring in the wheat harvest. My grandmother had a large garden and instilled in me from a young age the value of a garden. My parents continued to teach me through growing our own family garden for years and then the busyness of life demanded the need for convenience over preparedness and the garden fell to the wayside and eventually our plot of dirt became grass and then a garage was built over the location.

copyright 2020 Erin Castillo
Our boys in the wheat field as 2 year olds during harvest. Joshua is pictured on the left and Jason is pictured on the right.

When my twins were three years old, my husband got a consulting job in the Southeast, and we moved 3,000 miles across country to Atlanta, Georgia. Our soil profile changed from grey-ash-like soil to red dirt full of clay. I would put rich compost down into my garden beds only to find them return to hard clay by fall. My growing mojo had come to a screeching halt. (I would later learn what to do to re-build the soil profile thanks to new friends made in Georgia and other Master Gardeners.)

Feeling discouraged, I kept thinking there had to be a better way. That’s when I stumbled across a video of a guy on YouTube who was growing tomatoes hydroponically in Bato Buckets. I was fascinated by his methodology and soon I was pouring myself into any resource I could find about how to grow food hydroponically. It was also about this time, that my oldest two sons were studying the difference between human cells and plant cell structures. Since we were homeschooling, I decided to dive deeper into teaching them more about plant biology (botany) and together we were going to learn about hydroponics and how to grow food. My husband helped me guide the boys in building a Bato Bucket system like the one I saw on YouTube and I went down to my local nursery and bought 10 different tomato plants and we transplanted them into our new system. The boys would monitor the pH level and nutrient level of the plants and write down observations. It was a lab of sorts for us to learn from and boy did we learn!

The following year, my husband had a heart attack. It was then that I realized we were not doing enough about eating wholesome vegetables. In my research the previous years, I had narrowed my next hydroponic system to two options. But when our need became more urgent, I knew I didn’t want a DIY system — I needed something out of the box that would just work. (My last DIY system cost as much as the one out of the box.)  He agreed to getting three Tower Gardens by JuicePlus+. Here was our first year’s crop (pictured below).

9996B4F9-1DC7-4CC4-95E9-269B7B12AF98

I was amazed at how easy it was to fit it into my busy lifestyle. No weeding. No effort to build up soil. No nematodes to eat my crop. No irrigation system to monitor or standing there day in and day out to water plants for a half hour while our water bill took a hit. I would just watch the reservoir every week and check pH and nutrients — it was right up my alley. I needed low-maintanence gardening. Joshua dove in with me and helped monitor the growing system as well.

7230F528-A8DE-4B1E-B00B-42E324602593

I also learned of our local Master Gardener program through our Extension Office that shared space with 4H. I took the kids to any free program they had to offer on growing things or even one was on bee keeping. In fact, Joshua won the door prize at one of these meetings and he and my youngest son walked away with some free plants! It was around this time (I think Joshua’s Junior year) that I turned to him and planted the seed-thought of him becoming a Master Gardener. He had the time now to make that happen and then could use the skills he learned for the rest of his life instead of waiting to the end of his life when he retired to enjoy it. He was excited by the thought of that idea and inquired only to find that you had to be 18. He wouldn’t be able to do it as his senior year project. But he didn’t give up on the goal.  He applied for the Master Gardener program that was to begin around the time of his 18th birthday.

908C0205-974C-404D-8426-DCE1736A5E5E

What probably many don’t know is that during this time, our family went through a difficult time. My mother, who lived 3,000 miles away, needed help getting through a situation she found herself in and I had to leave for several weeks to help her. This unfortunately coincided with Joshua starting his Master Gardener training. He took an Uber each day and paid $20 out of his own pocket to get to his classes until other arrangements could be made on his behalf.

One of the great things that I love about the Master Gardener program is the wisdom of those who are involved. I’ve tried to teach my children to reach out to those with grey hair as they are a library of untapped resources. Joshua was blessed to have these amazing individuals come along side him and help him. They loved him because with his youth brought much needed muscles! lol I really wish there could be more young people involved because they are missing out on such a great resource. I want to see what can be done to bring these two groups of people together.

1C7A7BC7-4352-4F17-88D0-44CFBD04E776

Joshua juggled working his required 50-hours of volunteer hours around with working a job. I saw him increasingly frustrated when he would miss a Master Gardener meeting (often held during the day) because he had to work. But it showed me what he truly enjoyed. Thankfully, he came to realization himself and asked if he could work for me and help me instead of continue in the electrical program he was pursuing. I really needed his help knowing that my own goals included the possibility of growing our crops to the point where we could take it to the local farmer’s market to sell. So here we are today, working on our upcoming growing season and it is such a joy to work alongside my son. He’s smart and helps things get done when I don’t have the bandwidth to get to it. Currently, he’s helping me clear some land to do an herb garden installation. He is put in charge of his younger siblings who help him clear out ivy that has overrun the space we plan to utilize. He also is good at cleaning out Tower Gardens and sanitizing them (as well as our cutting tools). We hope to also propagate some of the beautiful resources on our property to sell at the upcoming Master Gardener event this spring. And his favorite thing to grow indoors — orchids!

Joshua Master Gardener

So, last night’s award dinner was truly special and I felt so proud of him for pursuing what he loved. And I feel so blessed to be his Mama and thankful that we have something in common to share over the years. I am praying for Joshua and that the Lord will continue to direct his steps as one day he will have his own family to provide for (and possibly me in my old age, Lord willing!)

Thanks for letting me share from my heart. And if I can encourage any of you with children… learn together! You don’t have to have all the answers or be an expert to be qualified to teach a child. It’s through the process of learning together about something that your children will come to understand that anything is possible to learn about if you just pursue it.

Happy Growing —

Erin

PS: If you ever read this post, Joshua, know that I am proud of you and can’t wait to see what you do next! Never stop dreaming and learning! Love you, Mom